
System Settings Detailed Configuration
Root-exclusive advanced system configuration options
This page details the various configuration tabs in System Settings, covering advanced feature configurations such as payment, rate limiting, chat, and drawing.
Payment Settings
Configure the payment methods and parameters supported by the platform.
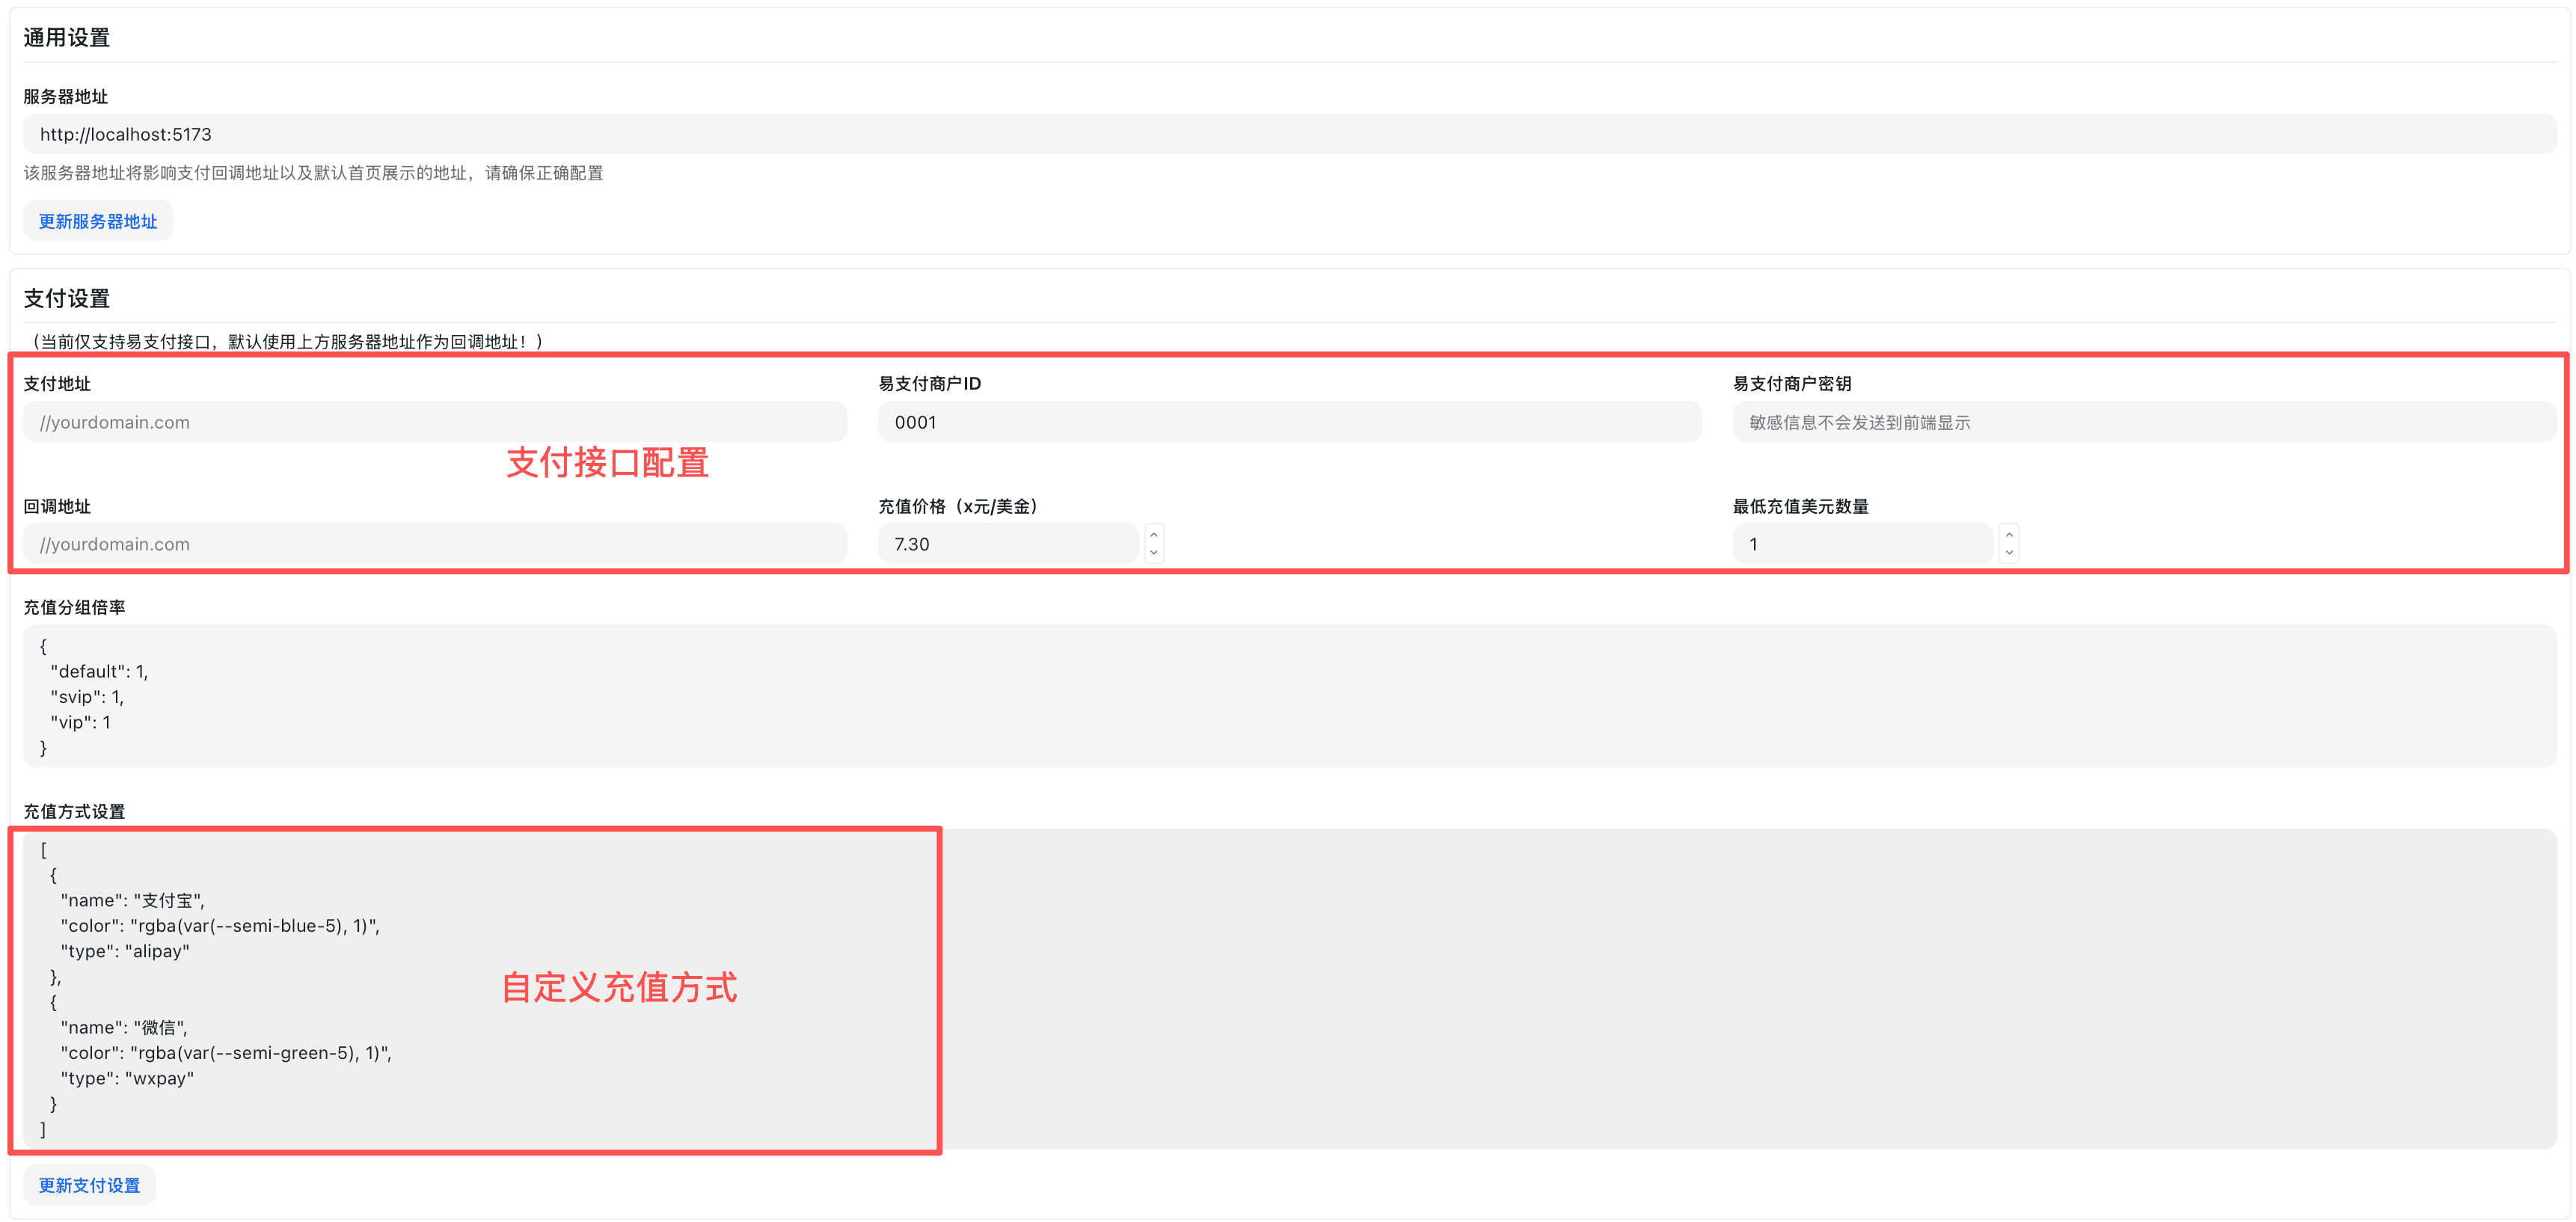
What is EPay
EPay is a generic term for the "third-party aggregated payment gateway/interface" model, not a specific website or company. It can refer to commercial aggregated payment services, as well as self-built/open-source gateway implementations that follow the "EPay protocol style."
Core Function: Aggregates channels like WeChat Pay, Alipay, and bank cards, providing merchants with unified order placement, signature verification, and callback interfaces.
Compliance Notice: The gateway itself is not equivalent to a licensed payment institution; fund clearing, settlement, and compliance depend on the licensed channels it integrates with. Please adhere to local regulatory and risk control requirements.
EPay Configuration
EPay is a domestic aggregated payment platform that supports Alipay, WeChat Pay, and more.
- On the System Settings page, click the "Payment Settings" tab.
- Locate the "EPay" configuration area.
- Fill in the following information:
- API Address: The interface address provided by EPay.
- Merchant ID (PID): Obtained from the EPay backend.
- Merchant Key (KEY): Obtained from the EPay backend.
- Check "Enable EPay".
- Click "Save".
The platform callback parameters include a signature, which the system will verify and automatically credit.
Stripe Configuration
Stripe is an international credit card payment platform.

- On the Payment Settings page, locate the "Stripe" configuration area.
- Fill in the following information:
- API Key (Secret Key): Obtained from the Stripe console.
- Publishable Key: Obtained from the Stripe console.
- Webhook Signing Secret: Obtained after configuring the Webhook.
- Product Price ID: The price ID of the Stripe product.
- Check "Enable Stripe".
- Click "Save".
Stripe requires configuring a Webhook to receive payment status notifications. The Webhook URL is: https://your-domain.com/api/payment/stripe/webhook
Other Payment Methods
The platform also supports the following payment methods, with similar configuration steps:
- Creem: International payment platform.
- Waffo: International payment platform.
Top-up Method Settings
In "Top-up Methods", you can configure according to the following structure:
[
  {
    "color": "rgba(var(--semi-blue-5), 1)",
    "name": "支付宝",
    "type": "alipay"
  },
  {
    "color": "rgba(var(--semi-green-5), 1)",
    "name": "微信",
    "type": "wxpay"
  },
  {
    "color": "rgba(var(--semi-green-5), 1)",
    "name": "Stripe",
    "type": "stripe",
    "min_topup": "50"
  },
  {
    "name": "自定义1",
    "color": "black",
    "type": "custom1",
    "min_topup": "50"
  }
]
Field Description
- name: Display text. Shown on the "Select Payment Method" button (e.g., "Alipay/WeChat/Stripe/Custom1").
- color: The theme or border color for the button/badge. Supports any CSS color value, it is recommended to use existing design tokens (e.g.,
rgba(var(--semi-blue-5), 1)). - type: Channel identifier, used for backend routing and order placement.
stripe→ Uses Stripe gateway.- Others (e.g.,
alipay,wxpay,custom1, etc.) → Uses EPay-style gateway, and passes this value as a channel parameter. - For detailed logic, see the backend controller controller/topup.go.
- min_topup: Minimum top-up amount (unit consistent with page currency). If the entered amount is less than this value, the page will prompt "The minimum top-up amount for this payment method is X" and restrict payment initiation; the backend will also perform validation.
- Order: Renders from left to right according to array order.
Top-up Amount Configuration
Custom Top-up Amount Options
Set the top-up amount options that users can choose, for example:
[10, 20, 50, 100, 200, 500]These values will be displayed in the "Select Top-up Quota" area, and users can directly click to choose the corresponding top-up amount.
Top-up Amount Discount Configuration
Set discounts corresponding to different top-up amounts, where the key is the top-up amount and the value is the discount rate, for example:
{
  "100": 0.95,
  "200": 0.9,
  "500": 0.85
}
Configuration Description:
- Key: Top-up amount (string format).
- Value: Discount rate (a decimal between 0-1, e.g., 0.95 means 95% of the price, i.e., a 5% discount).
- The system will automatically calculate the actual payment amount and savings based on the configuration.
- For detailed implementation logic, see the backend controller controller/topup.go.
Top-up discounts can incentivize users to top up larger amounts at once, increasing user stickiness.
Rate Limit Settings
Configure API call frequency limits to prevent abuse and protect system stability.
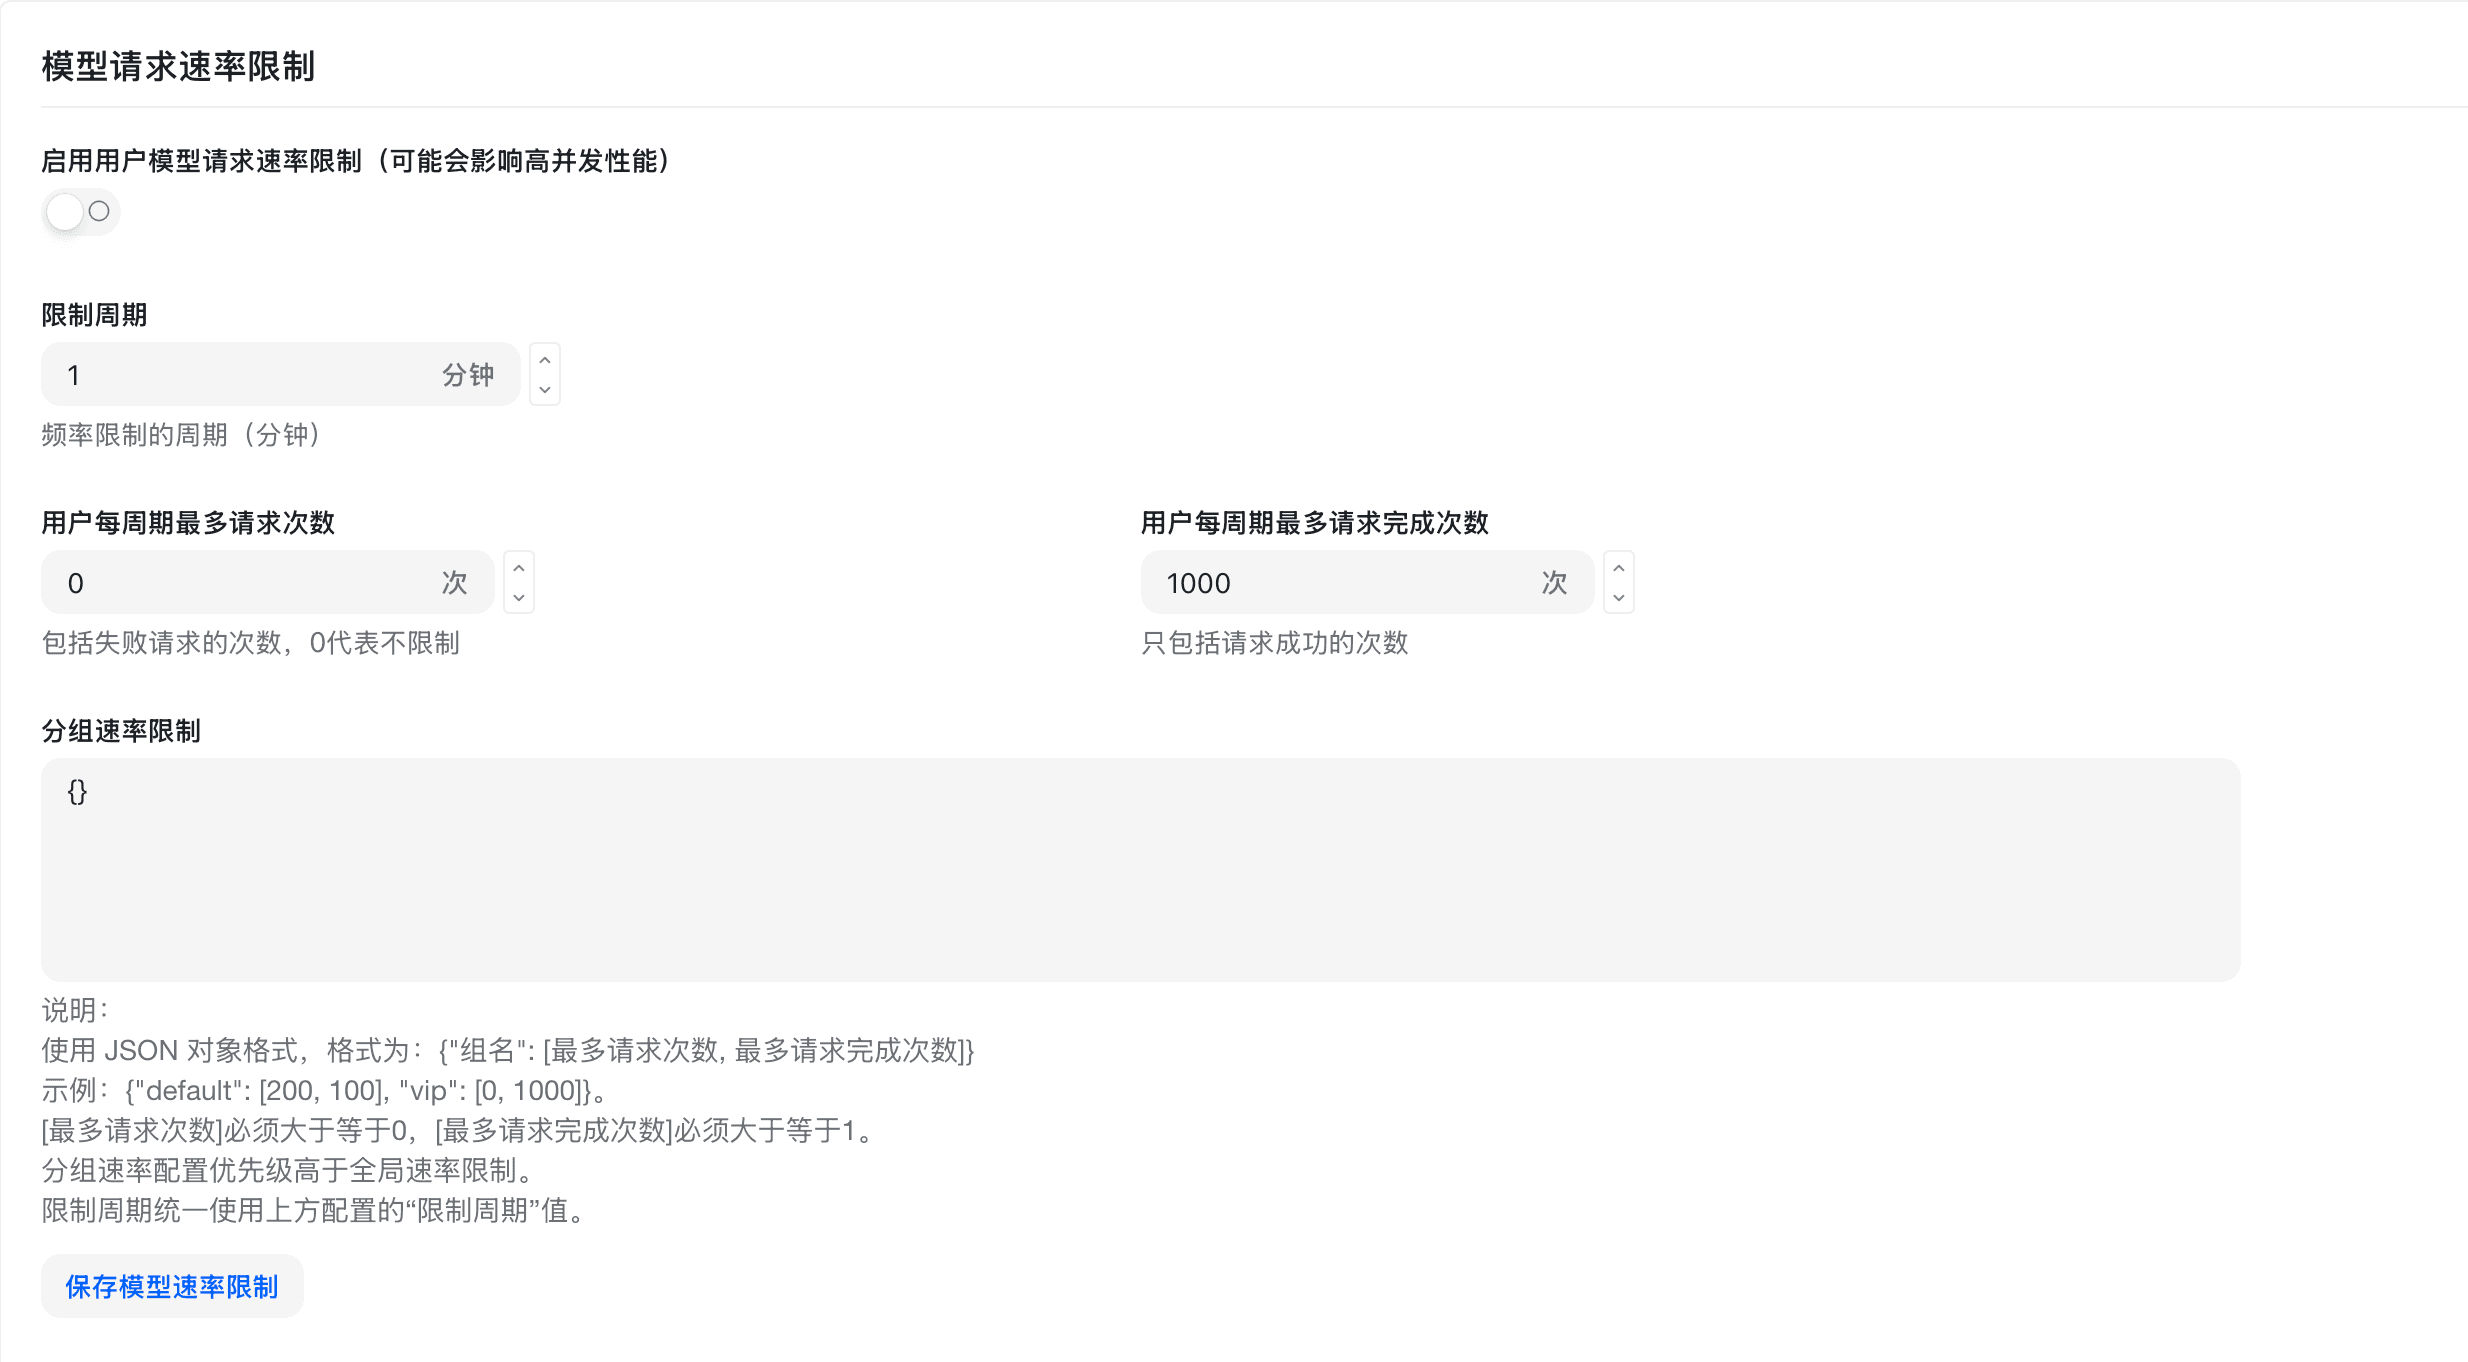
Global Rate Limiting
- On the System Settings page, click the "Rate Limit Settings" tab.
- Configure global rate limit parameters:
- Requests per Minute: Maximum requests per minute for a single IP.
- Requests per Hour: Maximum requests per hour for a single IP.
- Requests per Day: Maximum requests per day for a single IP.
- Click "Save".
Rate Limiting by Token
Rate limit parameters can be set individually for each Token:
- Edit the Token on the Token Management page.
- Set the rate limit parameters for this Token in "Advanced Configuration".
- Token-level rate limits take precedence over global rate limits.
Rate Limiting by User Group
Different rate limiting strategies can be set for different user Groups:
- Edit the Group on the Group Management page.
- Set the rate limit parameters for this Group.
- All users within the Group share this rate limit configuration.
Group Rate Limit Configuration Example
{
  "default": [200, 100],
  "vip": [0, 1000]
}
Configuration Description:
- Key: Group name.
- Value: An array containing two numbers.
- First number: Requests per minute limit.
- Second number: Requests per hour limit.
- Setting to 0 means no limit.
Example Explanation:
defaultgroup: Maximum 200 requests per minute, maximum 100 requests per hour.vipgroup: No limit per minute, maximum 1000 requests per hour.
Setting rate limits too low may affect normal usage. It is recommended to configure them reasonably based on actual business needs.
Ratio Settings
Ratio settings are the core configuration of the Unode billing system. By setting different Ratios, you can flexibly control the billing standards for various models and user groups.
Ratio System Overview
Unode uses a three-tier Ratio system to calculate user Quota consumption:
- Model Ratio - Defines the base billing multiplier for different AI models.
- Completion Ratio - Applies additional billing adjustments for output tokens.
- Group Ratio - Sets differentiated billing multipliers for different user groups.
Relationship between Quota and Ratio
In the Unode system, Ratios are key parameters for calculating Quota consumption. Quota is the internal billing unit of the system, and all API calls are ultimately converted into Quota points for deduction.
Quota Unit Conversion:
- 1 USD = 500,000 Quota points.
- Quota points are the basic unit for internal system billing.
- User balances and consumption records are based on Quota points.
Quota Calculation Formula
Pay-as-you-go Models (Based on Token Consumption)
Quota Consumption = (Input Token Count + Output Token Count × Completion Ratio) × Model Ratio × Group RatioPer-call Billing Models (Fixed Price)
Quota Consumption = Model Fixed Price × Group Ratio × Quota Unit (500,000)Audio Models (Special handling, automatically processed internally by new-api)
Quota Consumption = (Text Input Token + Text Output Token × Completion Ratio + Audio Input Token × Audio Ratio + Audio Output Token × Audio Ratio × Audio Completion Ratio) × Model Ratio × Group RatioPre-consumption and Post-consumption Mechanism
Unode employs a dual billing mechanism of pre-consumption and post-consumption:
- Pre-consumption Stage: Before an API call, Quota consumption is calculated based on estimated Token count and pre-deducted.
- Post-consumption Stage: After an API call is completed, Quota consumption is recalculated based on the actual Token count.
- Difference Adjustment: If the actual consumption differs from the pre-consumption, the system will automatically adjust the user's Quota balance.
Pre-consumption Quota = Estimated Token Count × Model Ratio × Group Ratio
Actual Quota = Actual Token Count × Model Ratio × Group Ratio
Quota Adjustment = Actual Quota - Pre-consumption Quota
Model Ratio Settings
Model Ratios define the base billing multipliers for different AI models. The system pre-sets default Ratios for various models.
Common Model Ratio Examples
| Model Name | Model Ratio | Completion Ratio | Official Price (Input) | Official Price (Output) |
|---|---|---|---|---|
| gpt-4o | 1.25 | 4 | $2.5/1M Tokens | $10/1M Tokens |
| gpt-3.5-turbo | 0.25 | 1.33 | $0.5/1M Tokens | $1.5/1M Tokens |
| gpt-4o-mini | 0.075 | 4 | $0.15/1M Tokens | $0.6/1M Tokens |
| o1 | 7.5 | 4 | $15/1M Tokens | $60/1M Tokens |
Ratio Meaning Explanation:
- Model Ratio: A multiplier relative to the base billing unit, reflecting cost differences between models.
- Completion Ratio: The billing multiplier for output tokens relative to input tokens, reflecting output cost differences.
- Higher Ratios consume more Quota; lower Ratios consume less Quota.
Setup Method
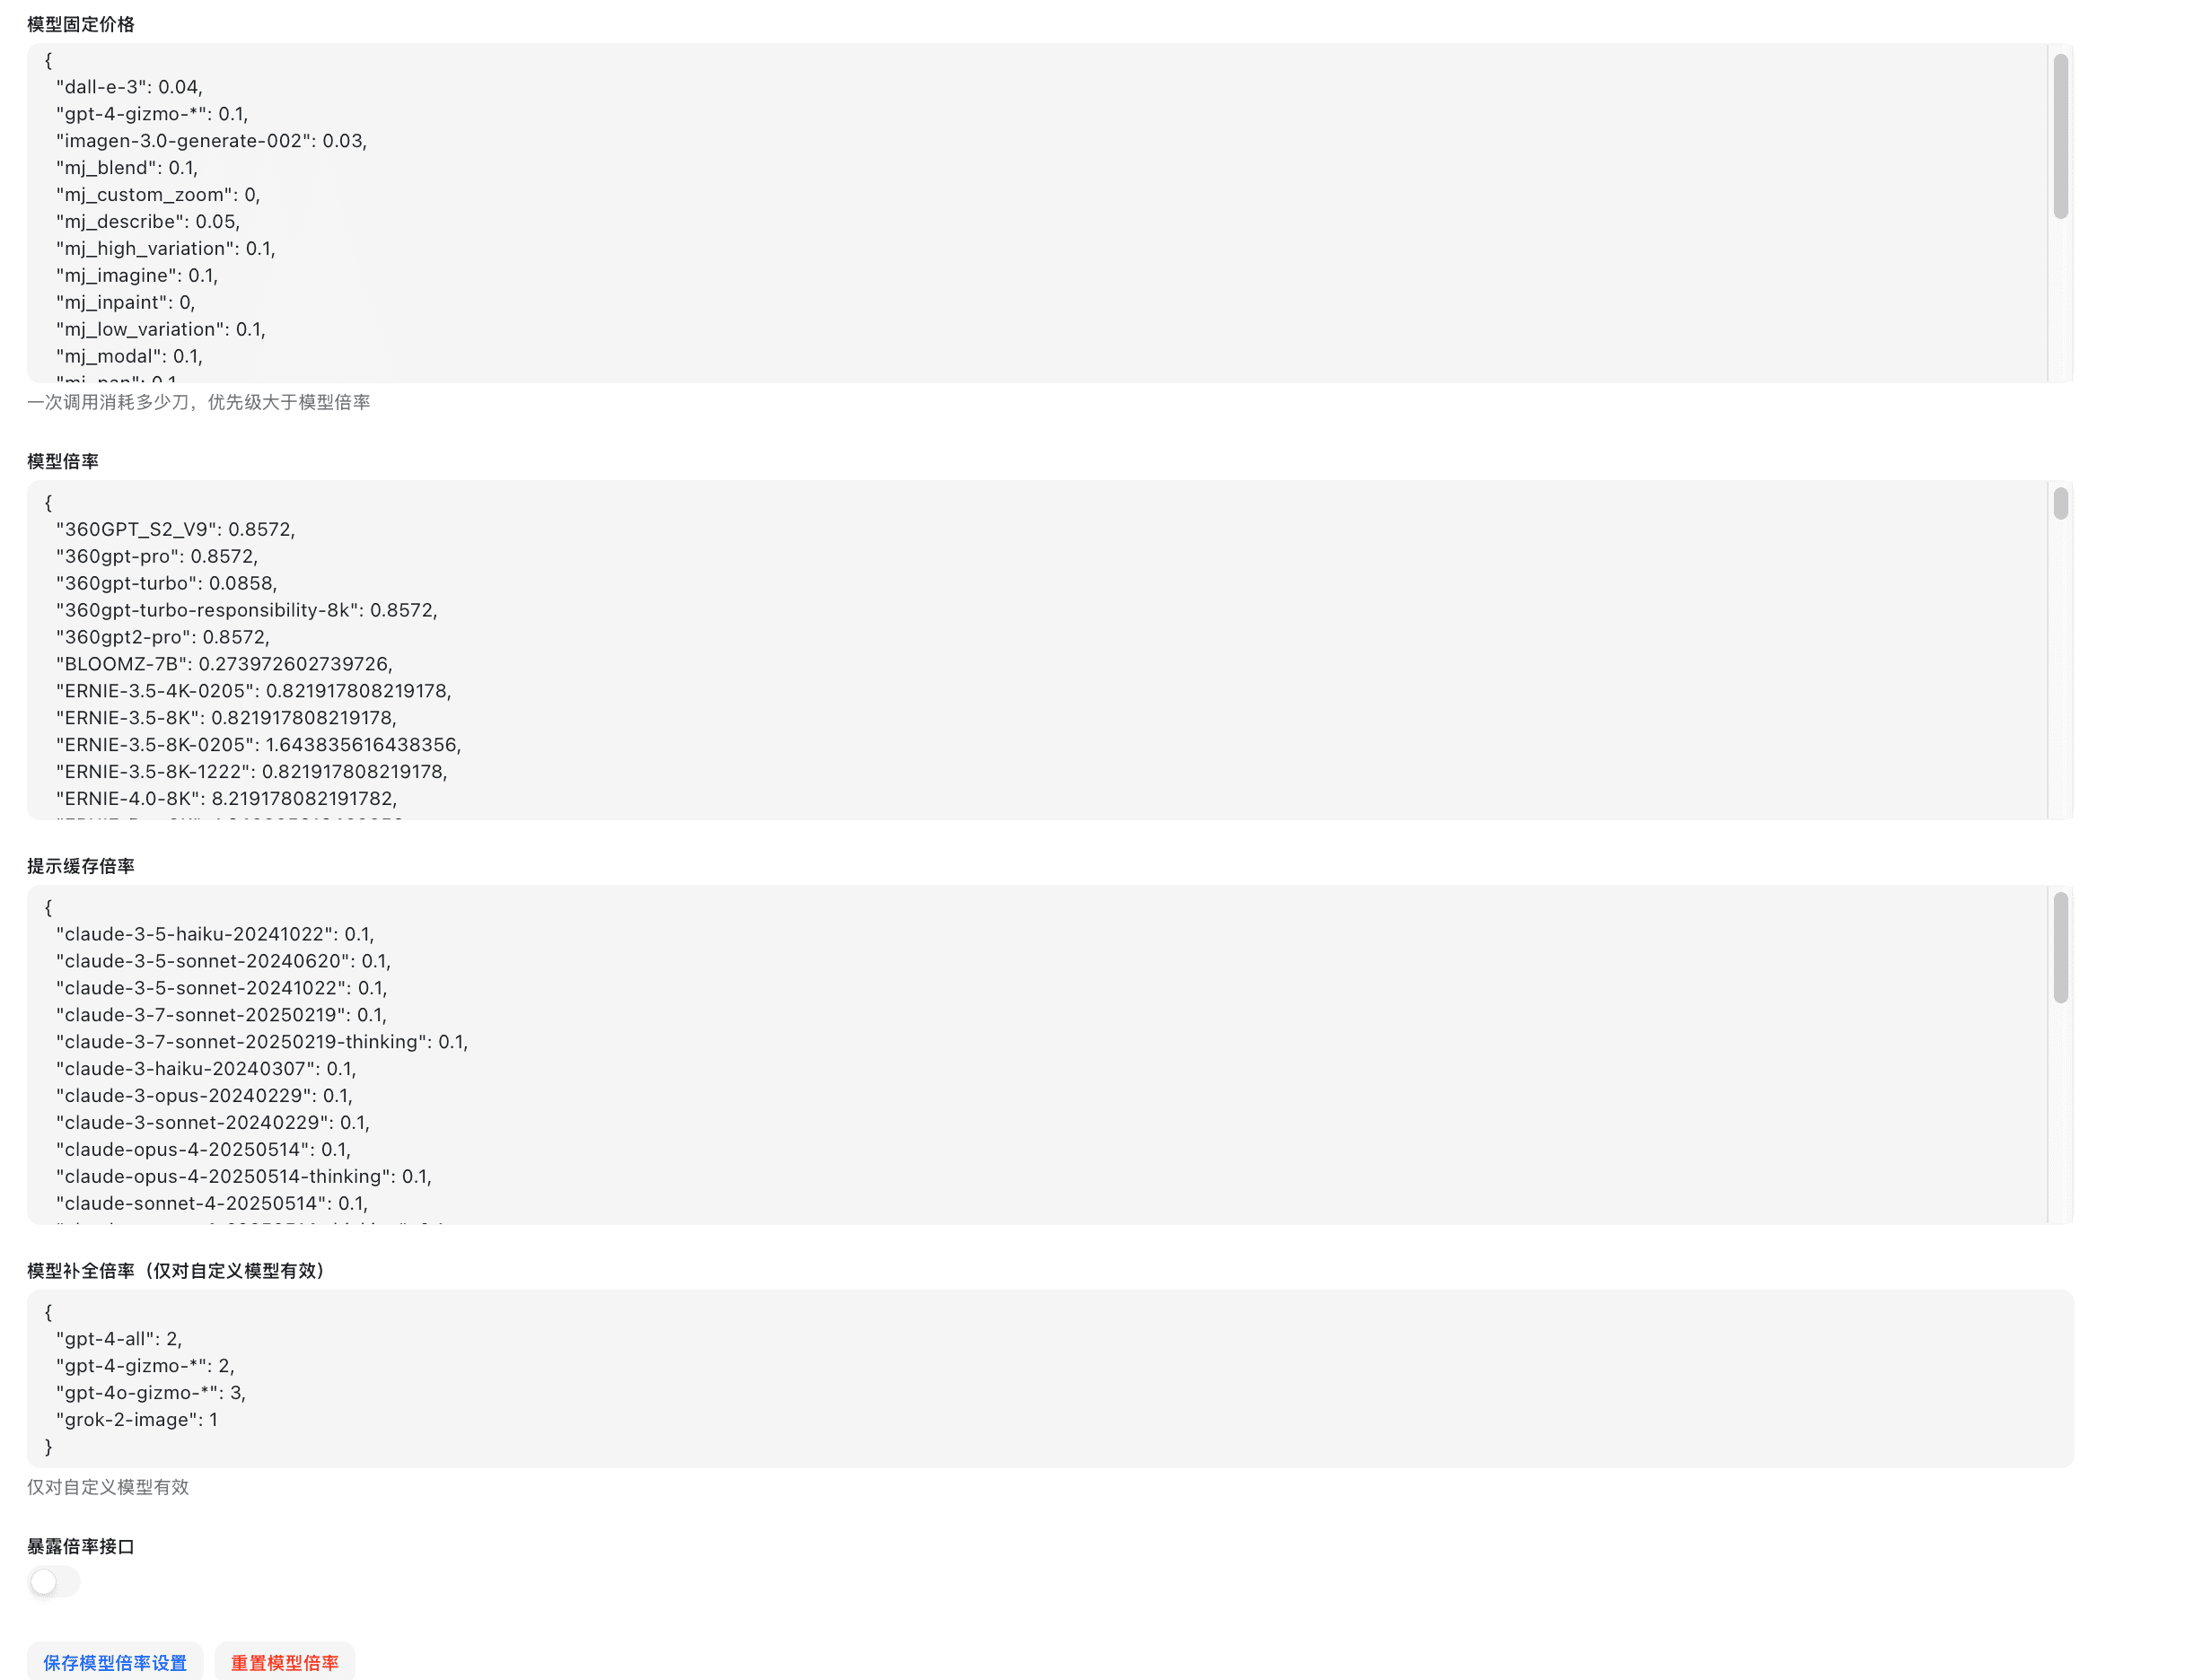
- On the System Settings page, click the "Ratio Settings" tab.
- Find the target model in the model Ratio list.
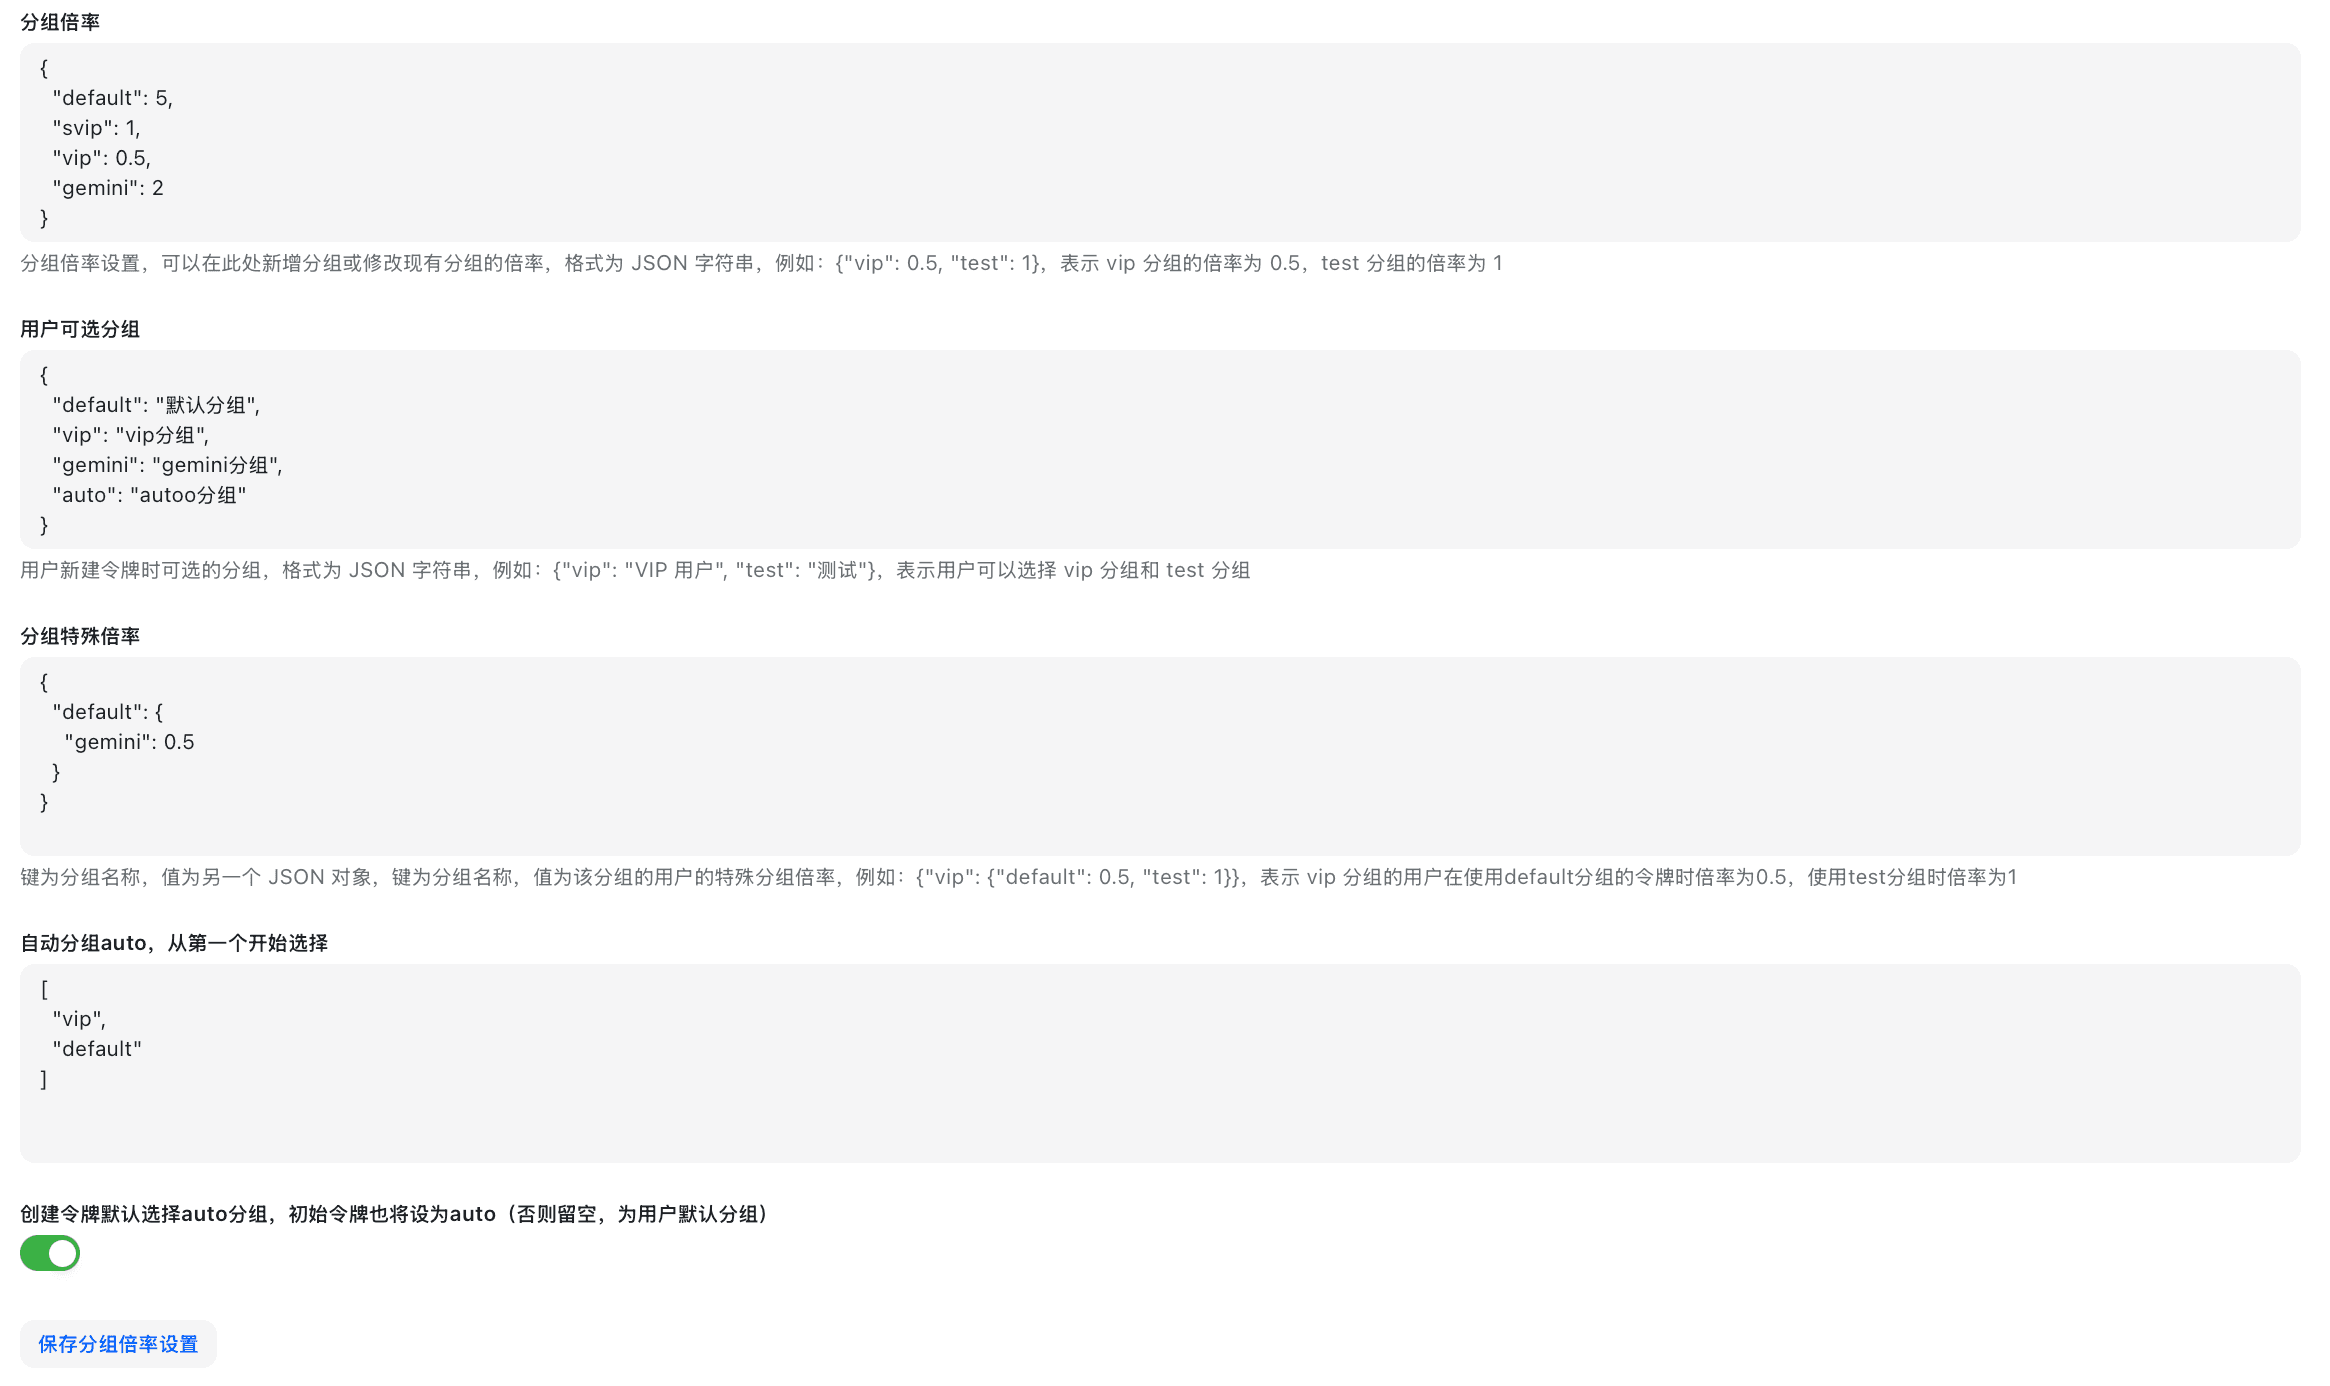
- Modify the following parameters:
- Input Ratio: Billing Ratio for input Tokens.
- Output Ratio: Billing Ratio for output Tokens.
- Completion Ratio: Billing Ratio for completion interfaces.
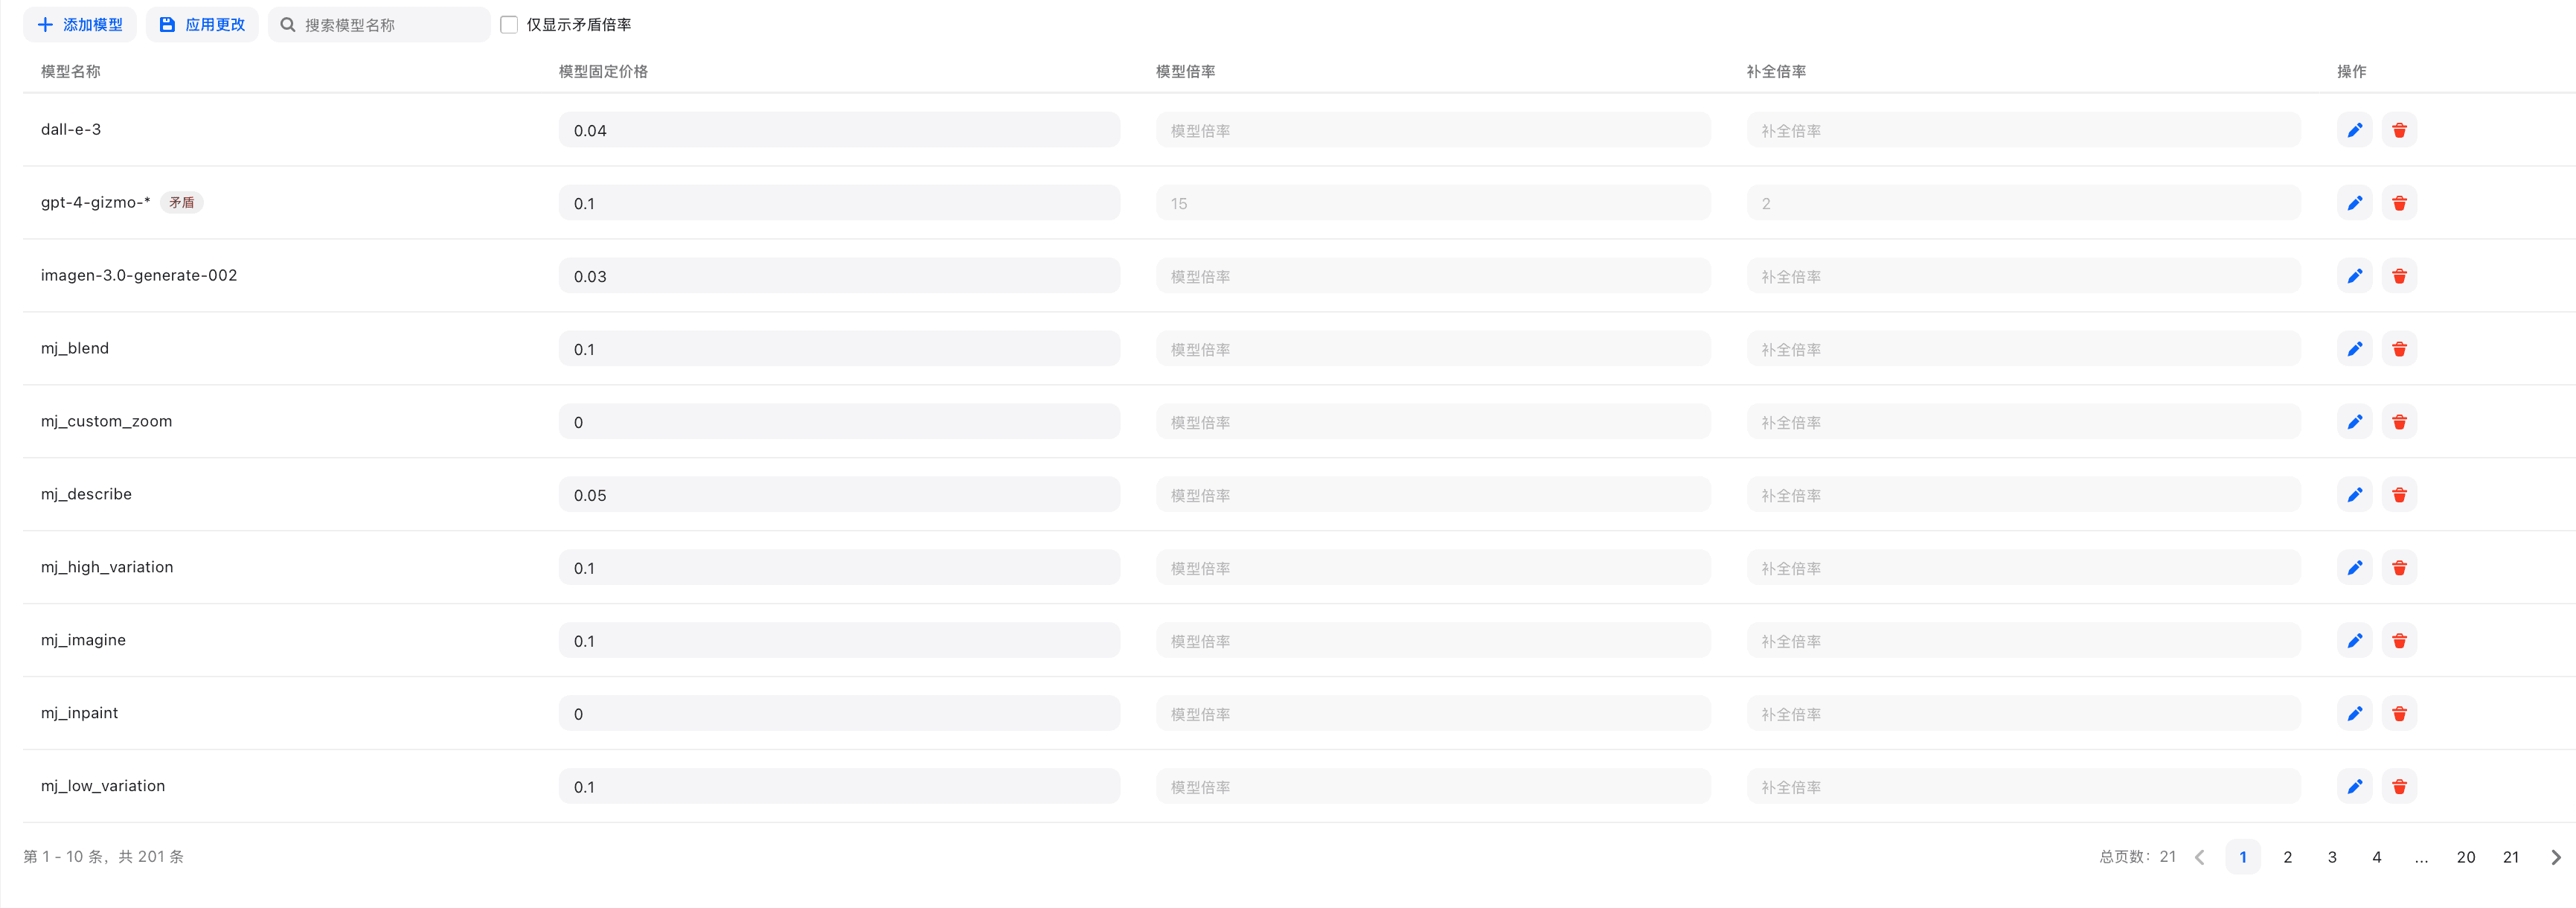
- Click "Save".
Setting Methods:
- JSON Format Setting: Directly edit the model Ratio JSON configuration.
- Visual Editor: Set Ratios through a graphical interface.
Completion Ratio Settings
Completion Ratios are used for additional billing of output tokens, primarily to balance the input and output cost differences of various models.
Default Completion Ratios
| Model Type | Official Price (Input) | Official Price (Output) | Completion Ratio | Description |
|---|---|---|---|---|
| gpt-4o | 2.5$/1M Tokens | 10$/1M Tokens | 4 | Output is 4 times input |
| gpt-3.5-turbo | 0.5$/1M Tokens | 1$/1M Tokens | 2 | Output is 2 times input |
| gpt-image-1 | 5$/1M Tokens | 40$/1M Tokens | 8 | Output is 8 times input |
| gpt-4o-mini | 0.15$/1M Tokens | 0.6$/1M Tokens | 4 | Output is 4 times input |
| Other Models | 1 | 1 | 1 | Output is 1 time input |
Setting Description:
- Completion Ratios primarily affect the billing of output tokens.
- Setting to 1 means output token billing is the same as input token billing.
- Greater than 1 means output token billing is higher, less than 1 means output token billing is lower.
Group Ratio Settings
Group Ratios allow for setting differentiated billing multipliers for different user groups, enabling flexible pricing strategies.
Group Ratio Configuration
{
  "vip": 0.5,
  "premium": 0.8,
  "standard": 1.0,
  "trial": 2.0
}
Group Ratio Priority
- User-specific Ratio: Individual Ratio set for a specific user.
- Group Ratio: The Ratio of the Group the user belongs to.
- Default Ratio: System default Ratio (usually 1.0).

Set differentiated billing Ratios for different user groups:
- On the Ratio Settings page, find the "Group Ratio" area.
- Select the target Group.
- Set the global Ratio coefficient for this Group (e.g., 0.8 means an 80% price, or 20% discount).
- Click "Save".
Group Ratio is calculated by stacking with Model Ratio:
Final Consumption = Token Count × Model Ratio × Group RatioVisual Ratio Settings
The visual editor provides an intuitive Ratio management interface, supporting:
- Batch editing of model Ratios.
- Real-time preview of Ratio configurations.
- Conflict detection and prompts.
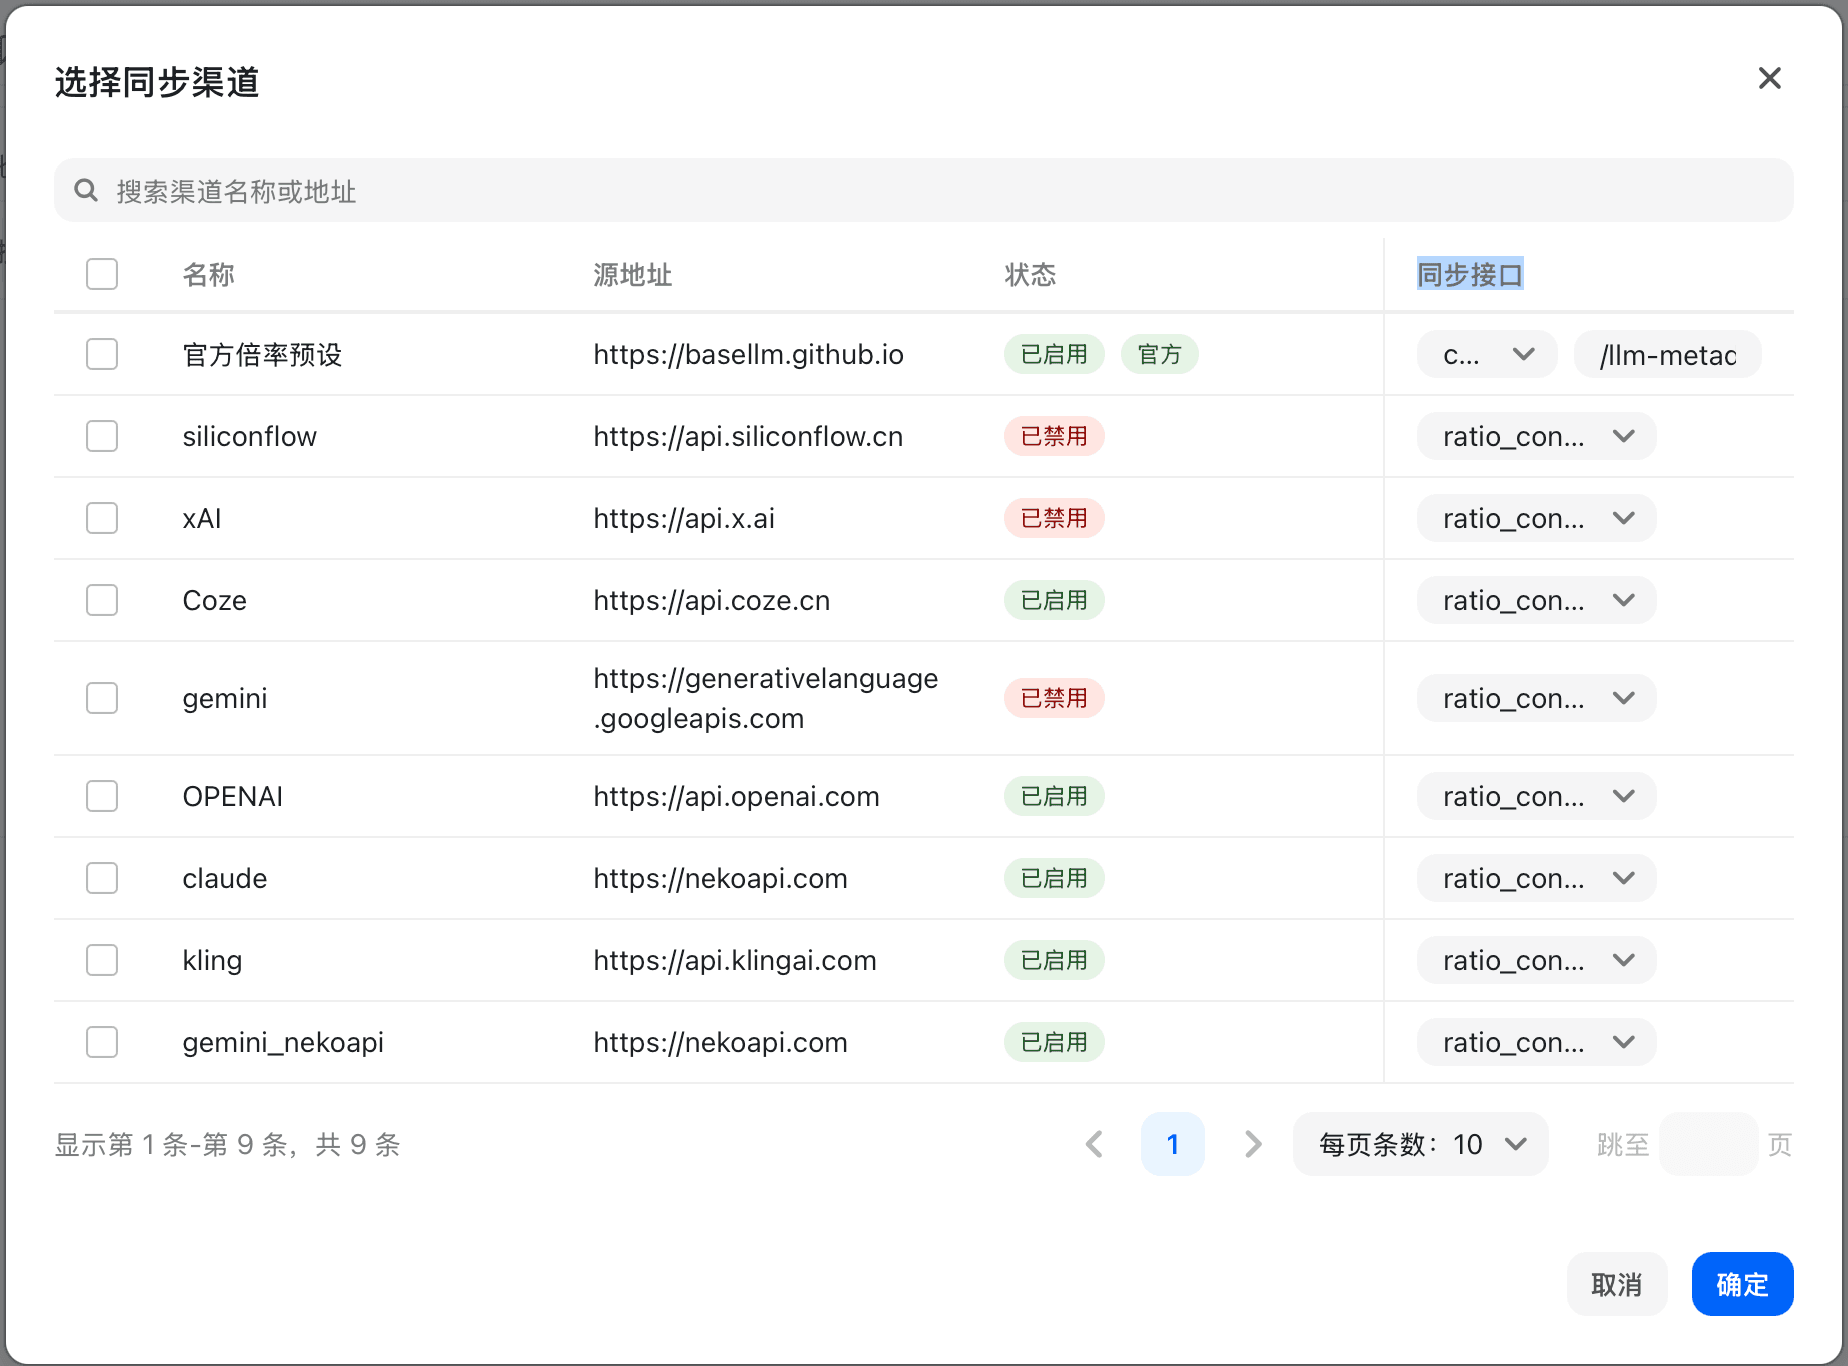
- One-click synchronization of upstream Ratios.
Models with Unset Ratios
For models with unset Ratios, the system will:
- Self-use Mode: Use a default Ratio of 37.5.
- Commercial Mode: Prompt a "Ratio or price not configured" error.
- Automatic Detection: Display unconfigured models in the management interface.
Upstream Ratio Synchronization
The system supports automatic synchronization of Ratio settings from upstream Channels:
- Automatically retrieve upstream model Ratios.
- Batch update local Ratio configurations.
- Keep in sync with upstream prices.
- Supports manual adjustment and override.
Frequently Asked Questions
Q: How to set Ratios for new models?
A: You can add new models through the visual editor or directly in the JSON configuration. It is recommended to set conservative Ratios first and adjust them based on actual usage.
Q: How do Group Ratios take effect?
A: Group Ratios are multiplied by model Ratios, ultimately affecting the calculation of user Quota consumption. A user's actual Ratio = Model Ratio × Group Ratio.
Q: What is the purpose of the Completion Ratio?
A: The Completion Ratio is mainly used to balance the cost differences between input and output tokens. For some models, output costs are significantly higher than input costs, requiring adjustment via the Completion Ratio.
Q: How to batch set Ratios for similar models?
A: You can perform batch operations through the visual editor, or directly add Ratio settings for similar models in the JSON configuration.
Quota Calculation Examples
Example 1: GPT-4 Standard User Conversation
Scenario Parameters:
- Input tokens: 1,000
- Output tokens: 500
- Model Ratio: 15
- Completion Ratio: 2
- Group Ratio: 1.0 (Standard user)
Calculation Process:
Quota Consumption = (1,000 + 500 × 2) × 15 × 1.0
         = (1,000 + 1,000) × 15
         = 2,000 × 15
         = 30,000 Quota points
Equivalent USD Cost: 30,000 ÷ 500,000 = $0.06
Example 2: GPT-3.5 VIP User Conversation
Scenario Parameters:
- Input tokens: 2,000
- Output tokens: 1,000
- Model Ratio: 0.25
- Completion Ratio: 1.33
- Group Ratio: 0.5 (VIP user 50% discount)
Calculation Process:
Quota Consumption = (2,000 + 1,000 × 1.33) × 0.25 × 0.5
         = (2,000 + 1,330) × 0.125
         = 3,330 × 0.125
         = 416.25 Quota points
Equivalent USD Cost: 416.25 ÷ 500,000 = $0.00083
Example 3: Per-call Billing Model (e.g., Midjourney)
Scenario Parameters:
- Model Fixed Price: $0.02
- Group Ratio: 1.0 (Standard user)
- Quota Unit: 500,000
Calculation Process:
Quota Consumption = 0.02 × 1.0 × 500,000
         = 10,000 Quota points
Equivalent USD Cost: 10,000 ÷ 500,000 = $0.02
For more billing rules, please see Frequently Asked Questions.
Chat Settings
Configure parameters related to the built-in chat function.
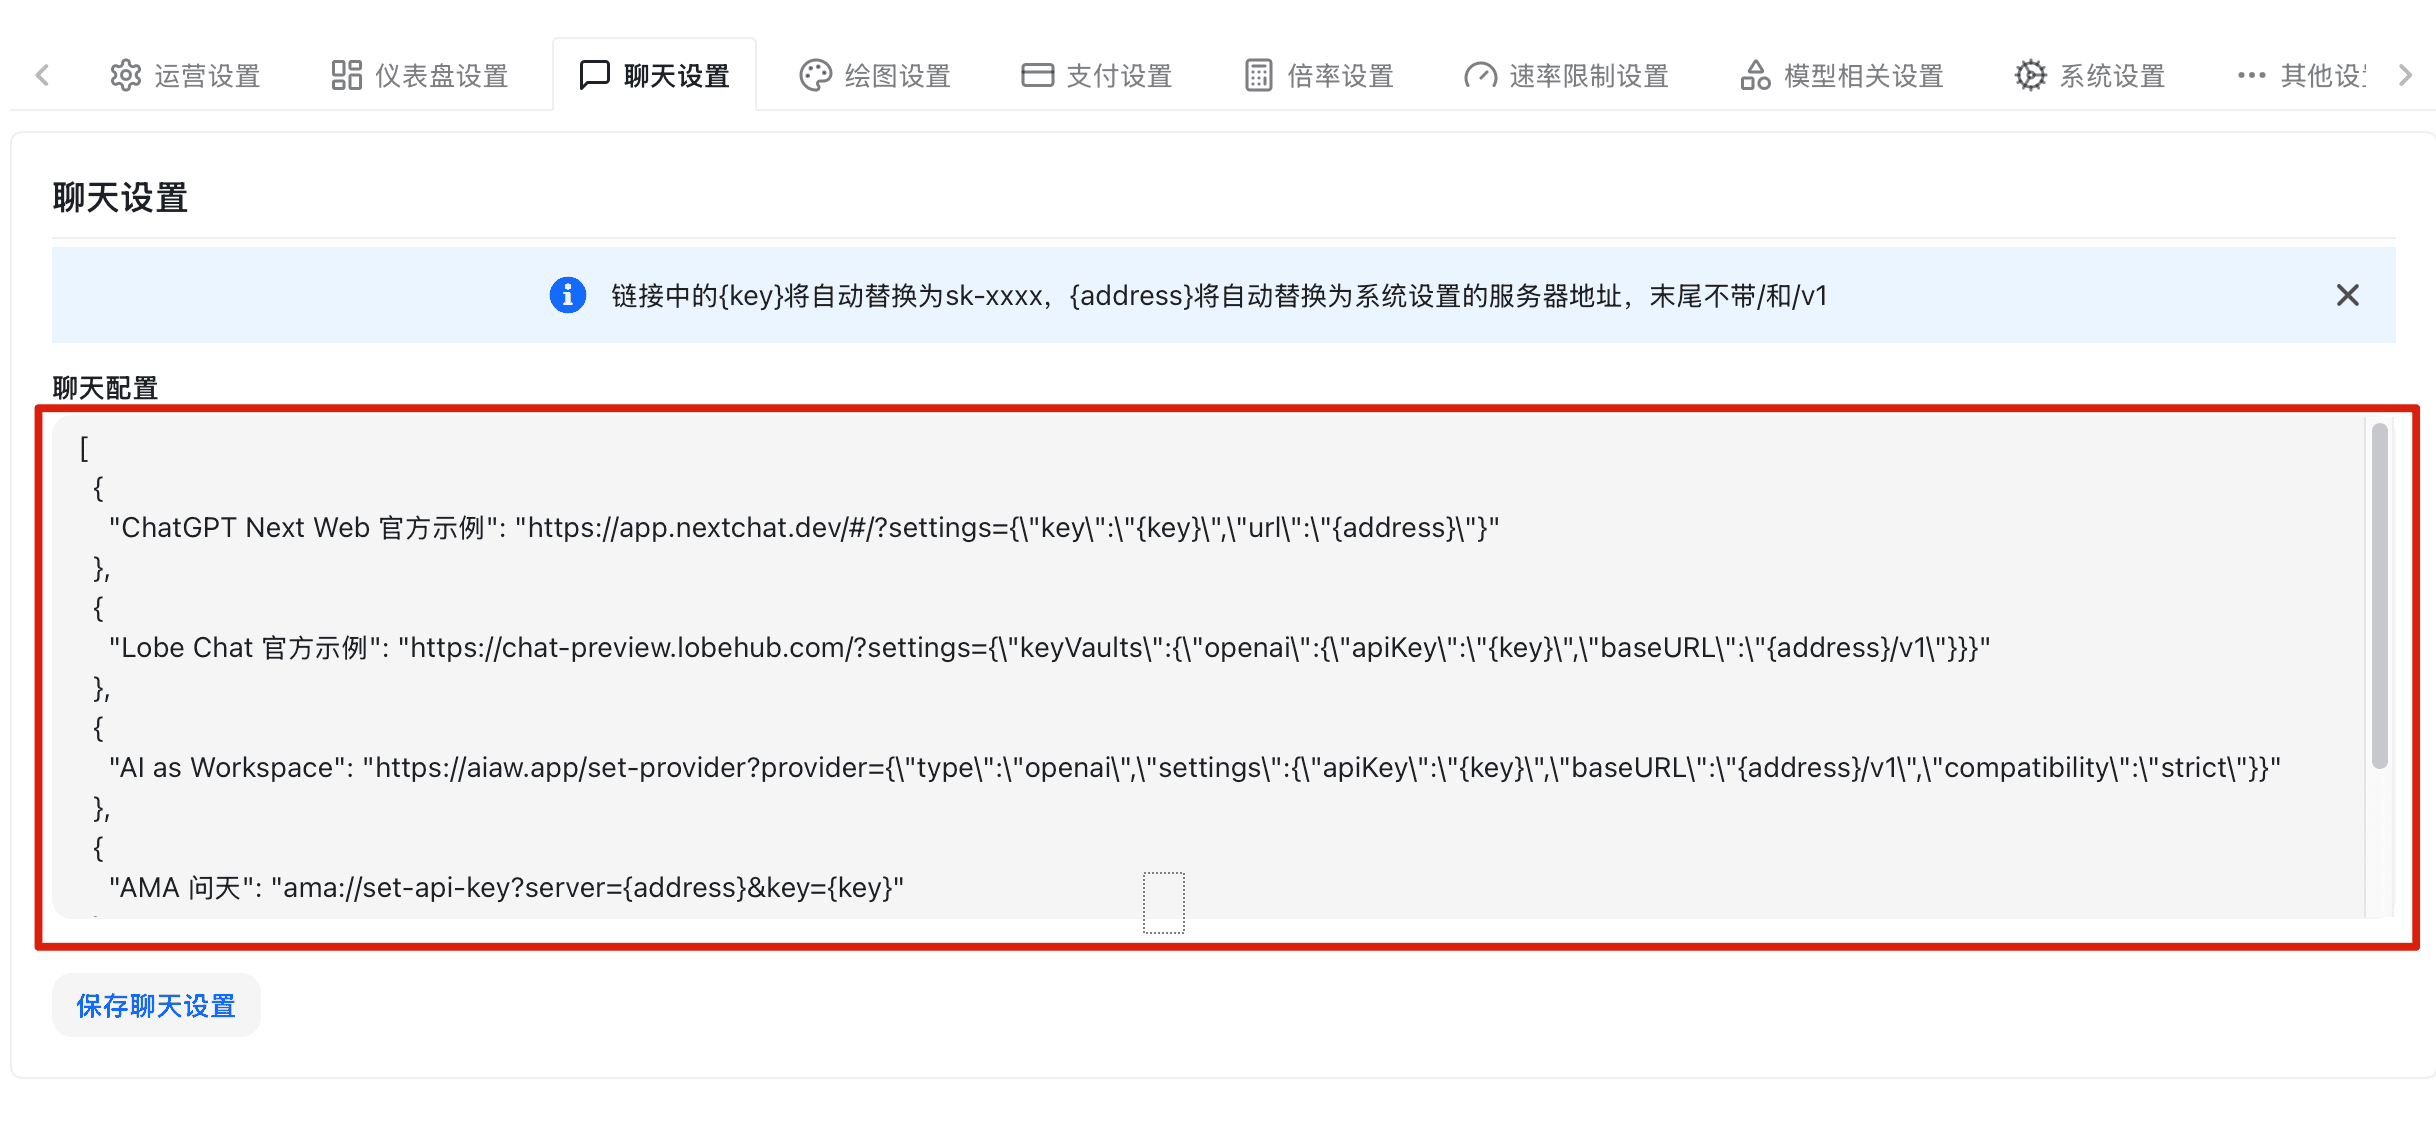
Chat Application Configuration
- On the System Settings page, click the "Chat Settings" tab.
- Configure the following options:
- Enable Chat Function: Toggle to enable or disable the built-in chat.
- Default Model: The model selected by default on the chat page.
- Max History Messages: Number of historical conversation turns to retain.
- Streaming Output: Whether streaming output is enabled by default.
- Click "Save".
Chat Integration Variables
When configuring chat application integration, the following variables can be used:
{key}: Replaced with the key (API Key).{address}: Replaced with the server address (without/and/v1at the end).
Usage Example:
Configuration Template:
https://{address}/v1After actual replacement:
https://api.example.com/v1These variables are automatically replaced with actual values when importing configurations into the chat application with one click.
Chat Application Integration
Configure integration parameters for third-party chat applications:
- ChatGPT Next Web: Configure deployment address.
- Lobe Chat: Configure recommended settings.
- Other Applications: Configure integration parameters.
Drawing Settings
Configure parameters related to drawing functions like Midjourney.
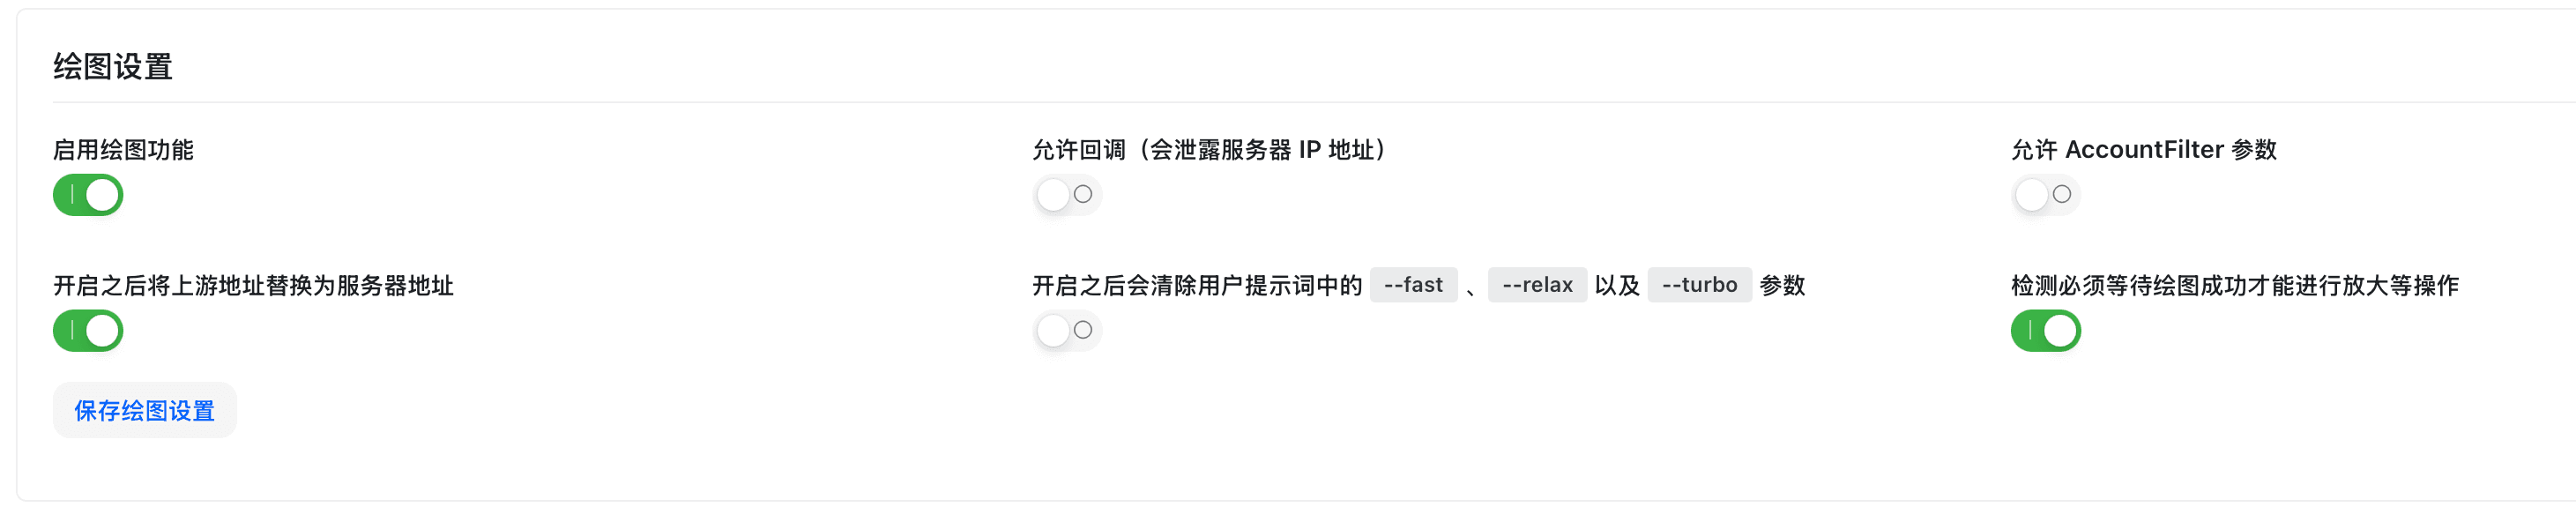
Midjourney Configuration
- On the System Settings page, click the "Drawing Settings" tab.
- Configure Midjourney parameters:
- Enable Midjourney: Toggle to enable or disable the drawing function.
- Midjourney Proxy Address: Midjourney-Proxy service address.
- API Key: Midjourney-Proxy's key.
- Timeout: Drawing task timeout (seconds).
- Click "Save".
Drawing Billing
Configure billing rules for drawing tasks:
- Per-call Billing: Each drawing consumes a fixed Quota.
- Time-based Billing: Billed according to drawing duration.
- Resolution-based Billing: Billed according to image resolution.
The Midjourney feature requires additional deployment of the Midjourney-Proxy service. See the deployment documentation for details.
Dashboard Settings
Configure the display content and statistical dimensions of the data dashboard.
Dashboard Configuration - Basic Settings
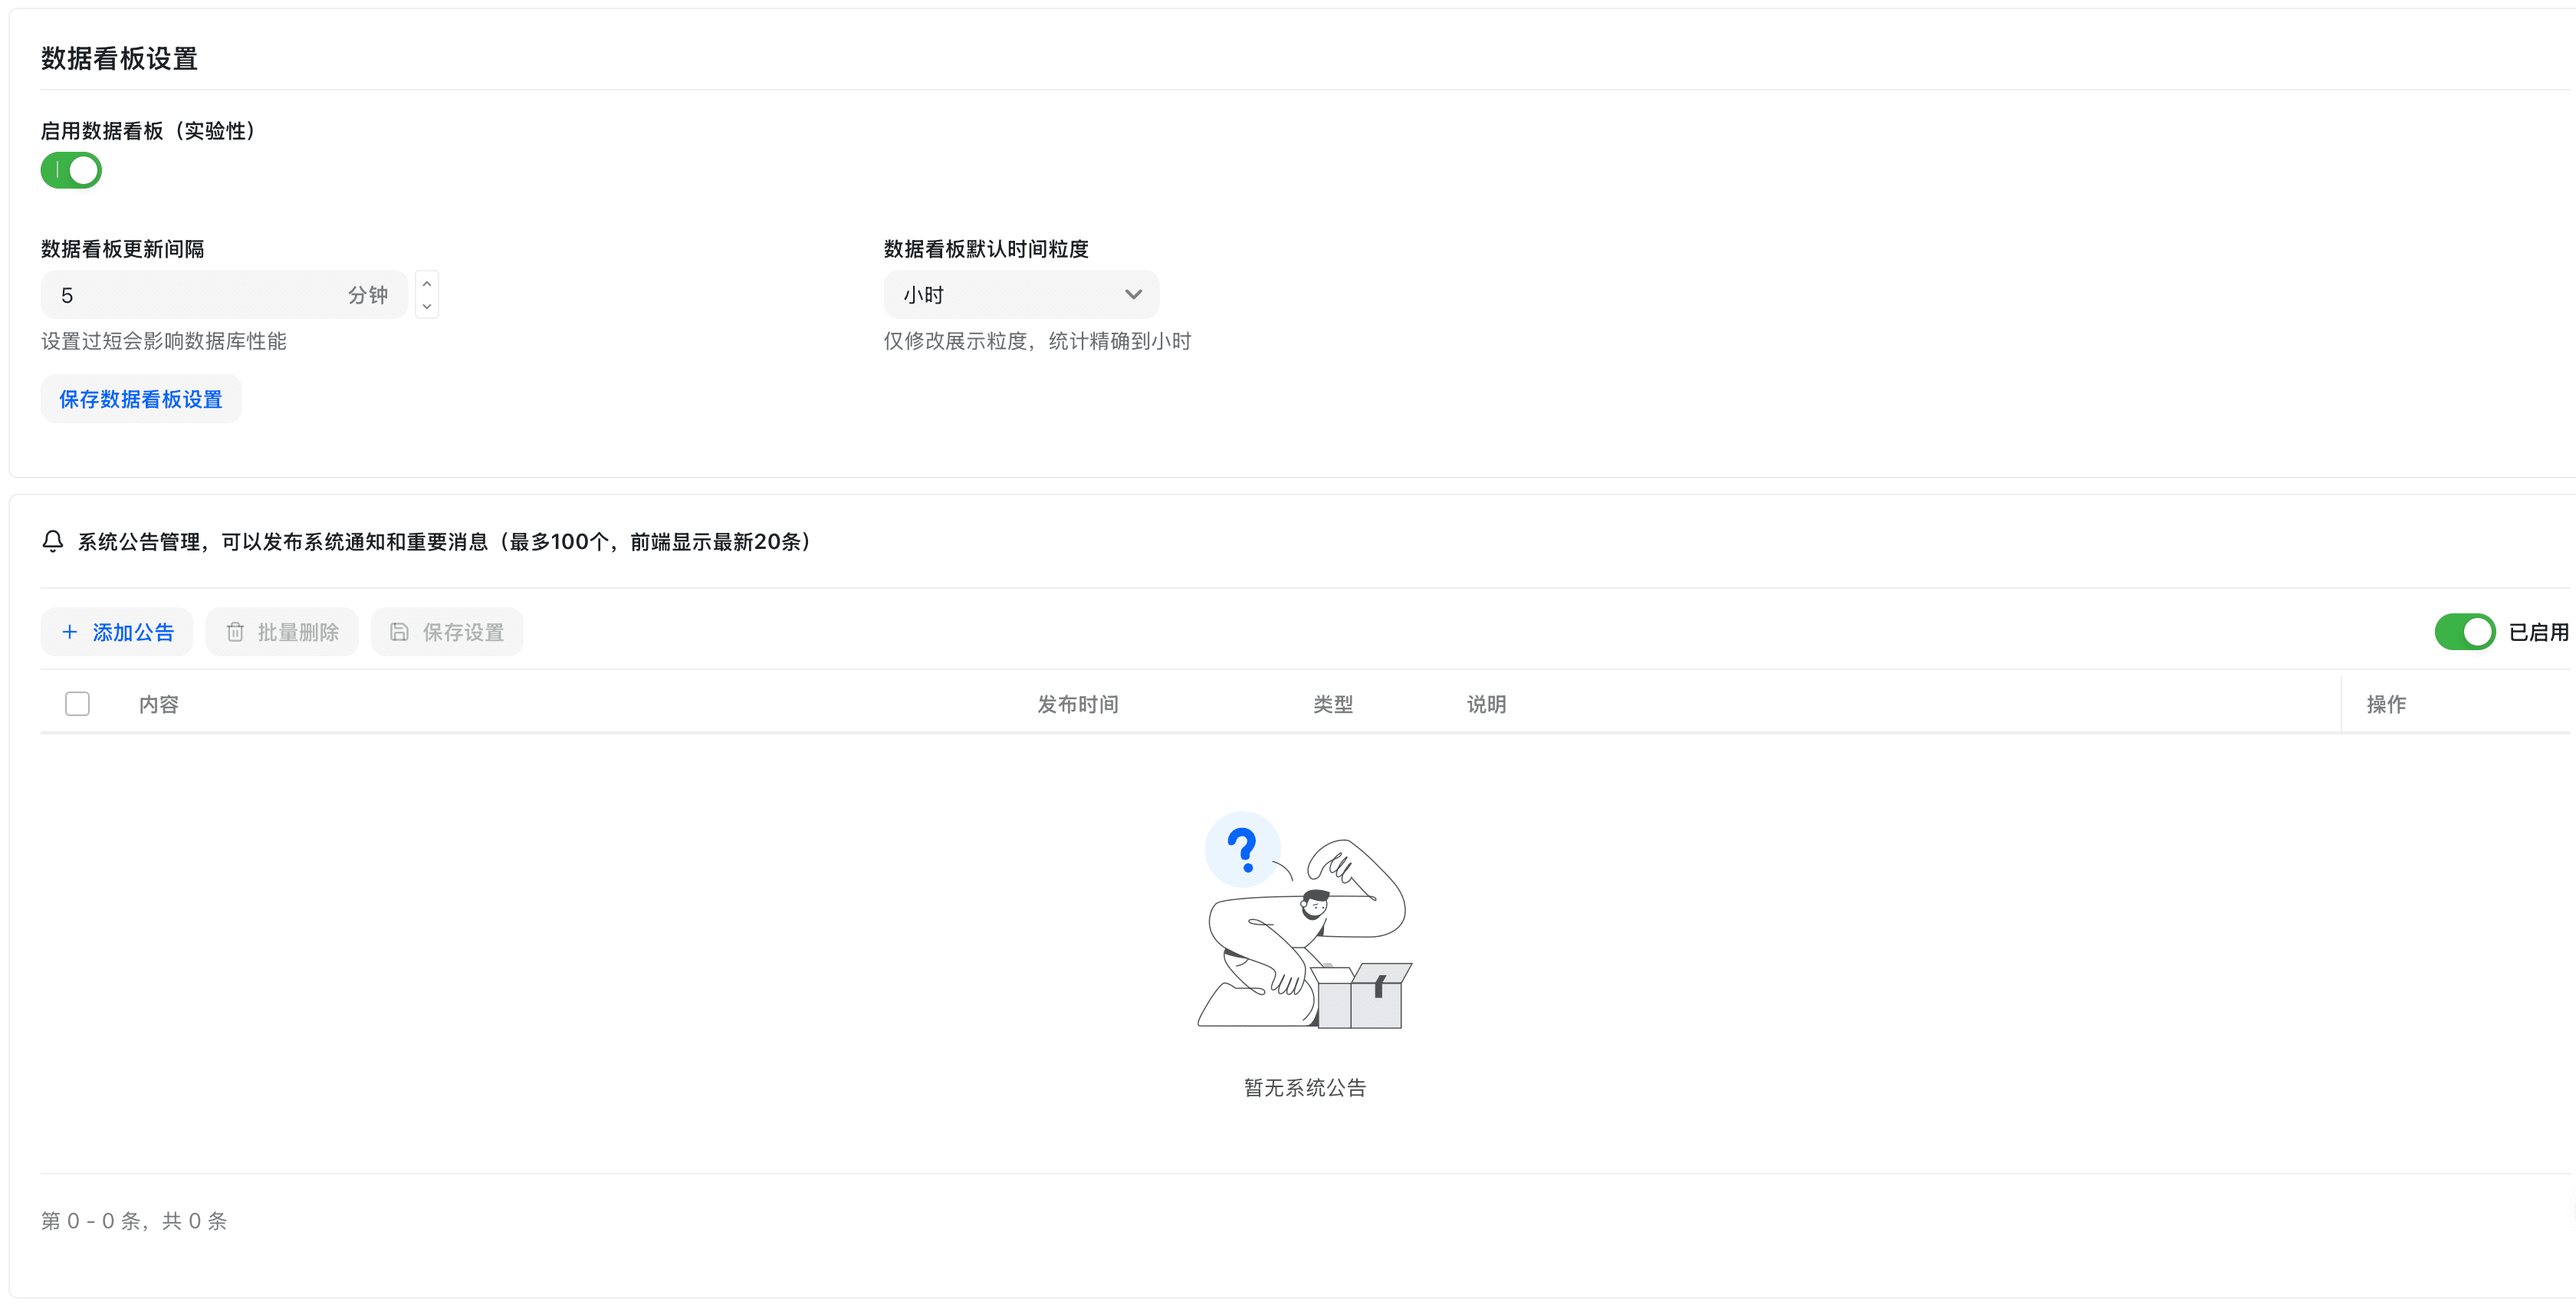
- On the System Settings page, click the "Dashboard Settings" tab.
- Configure display options:
- Show User Statistics: Whether to display user count statistics.
- Show Channel Statistics: Whether to display Channel usage statistics.
- Show Model Statistics: Whether to display model call statistics.
Dashboard Configuration - Chart Settings
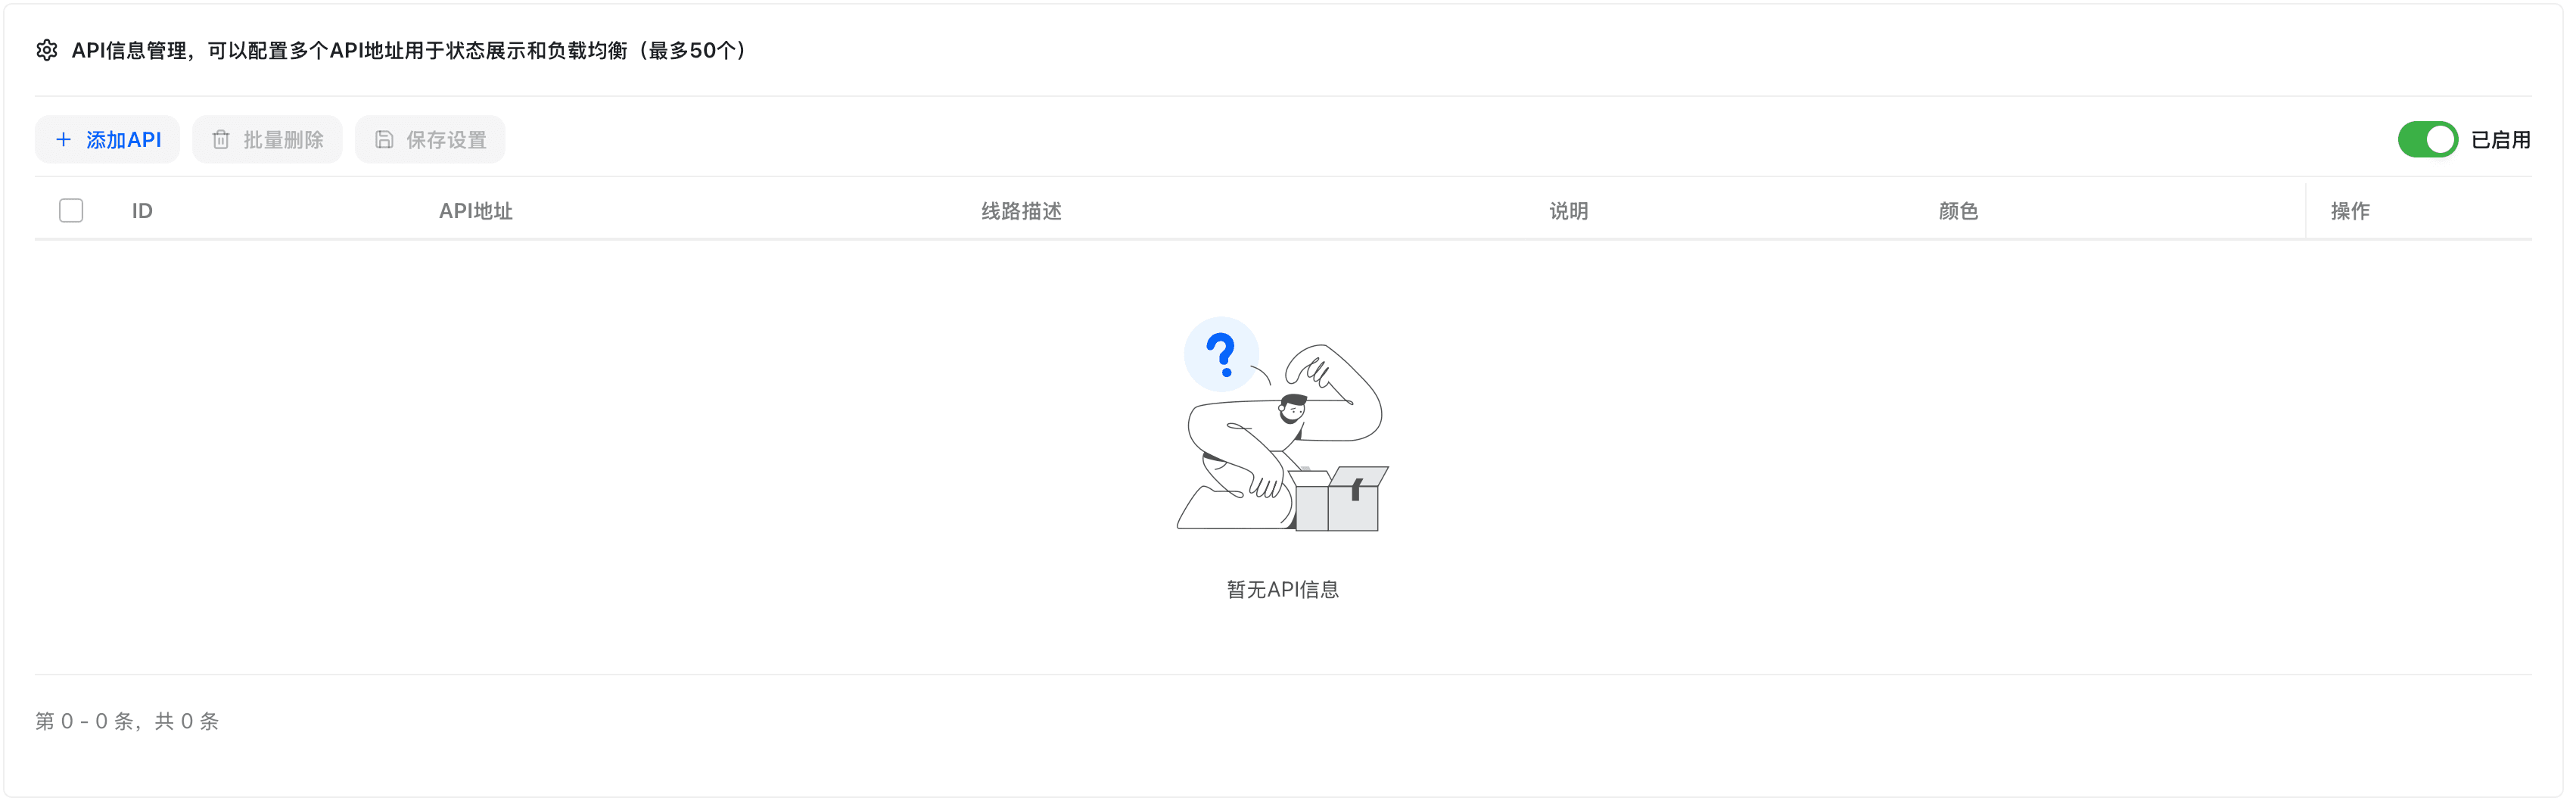
- Configure chart parameters:
- Default Time Range: The default time range displayed on the dashboard.
- Refresh Interval: The time interval for automatic refresh.
- Chart Type: Line chart, bar chart, or pie chart.
Dashboard Configuration - Advanced Options
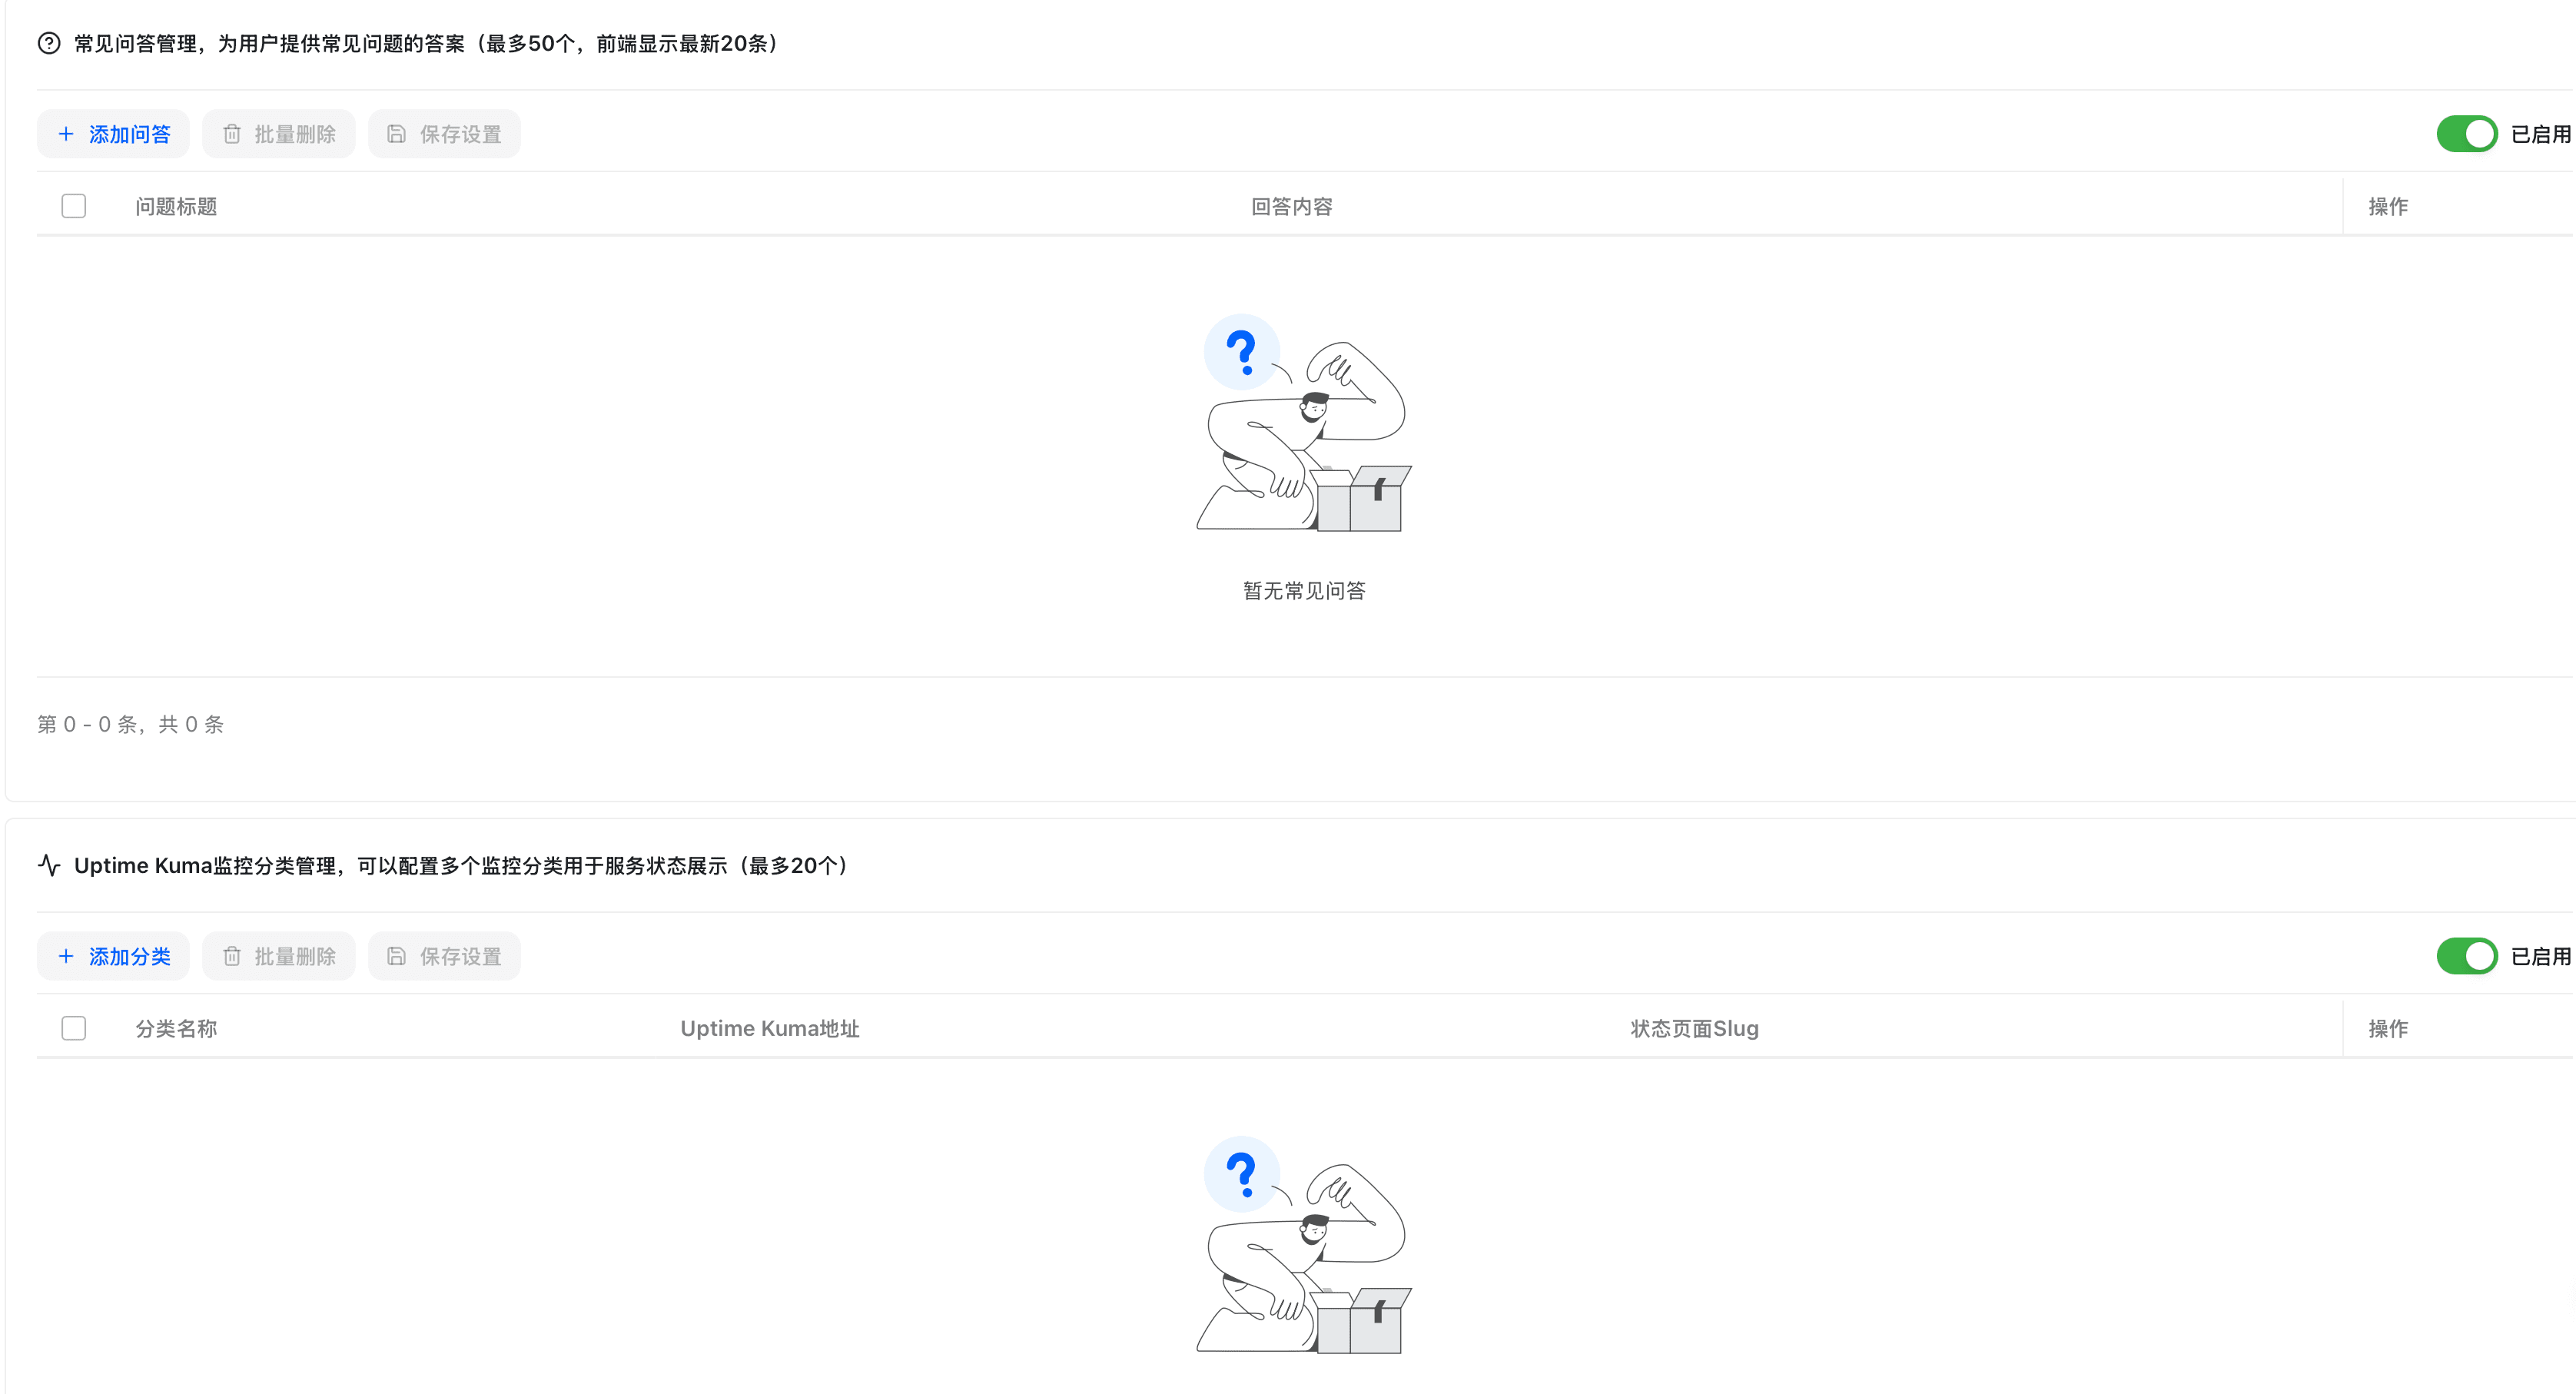
- Configure advanced options:
- Data Cache Time: Cache duration for statistical data.
- Show Real-time Data: Whether to display real-time statistics.
- Click "Save".
Model Settings
Configure model display and behavior parameters.
Model Display Settings
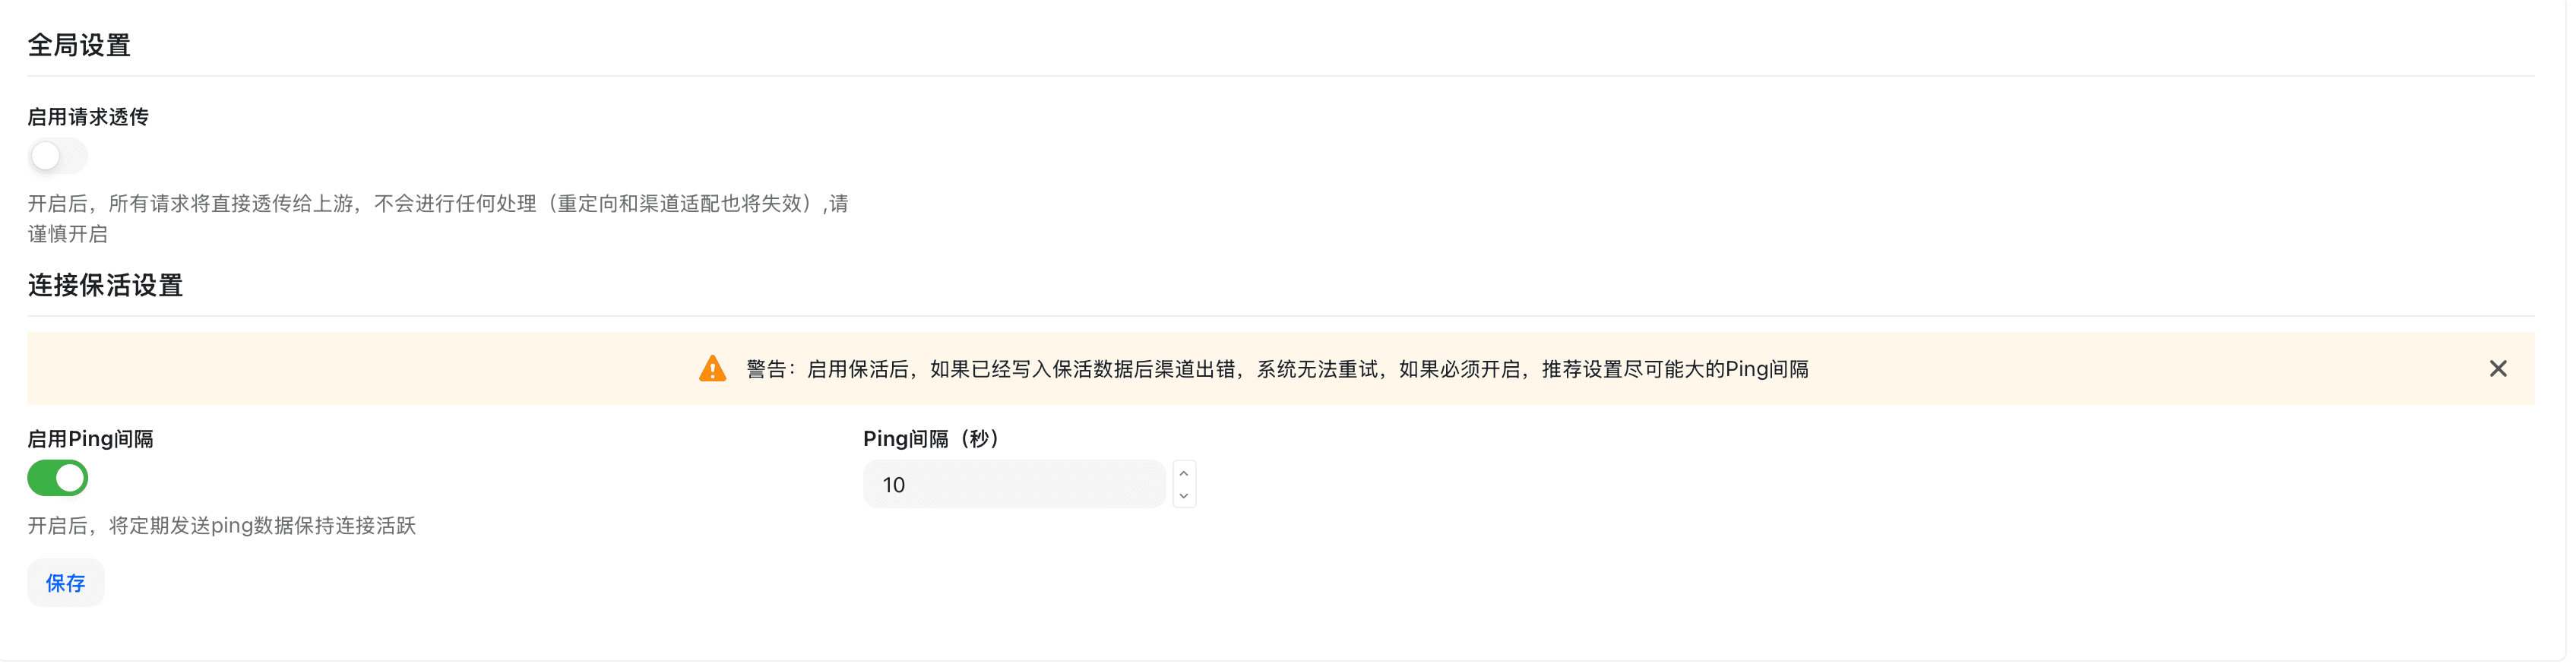
- On the System Settings page, click the "Model Settings" tab.
- Configure model display options:
- Show Model Description: Whether to display descriptions in the model list.
- Show Model Icon: Whether to display model vendor icons.
- Model Grouping Display: Group by vendor or type.
Model Behavior Settings
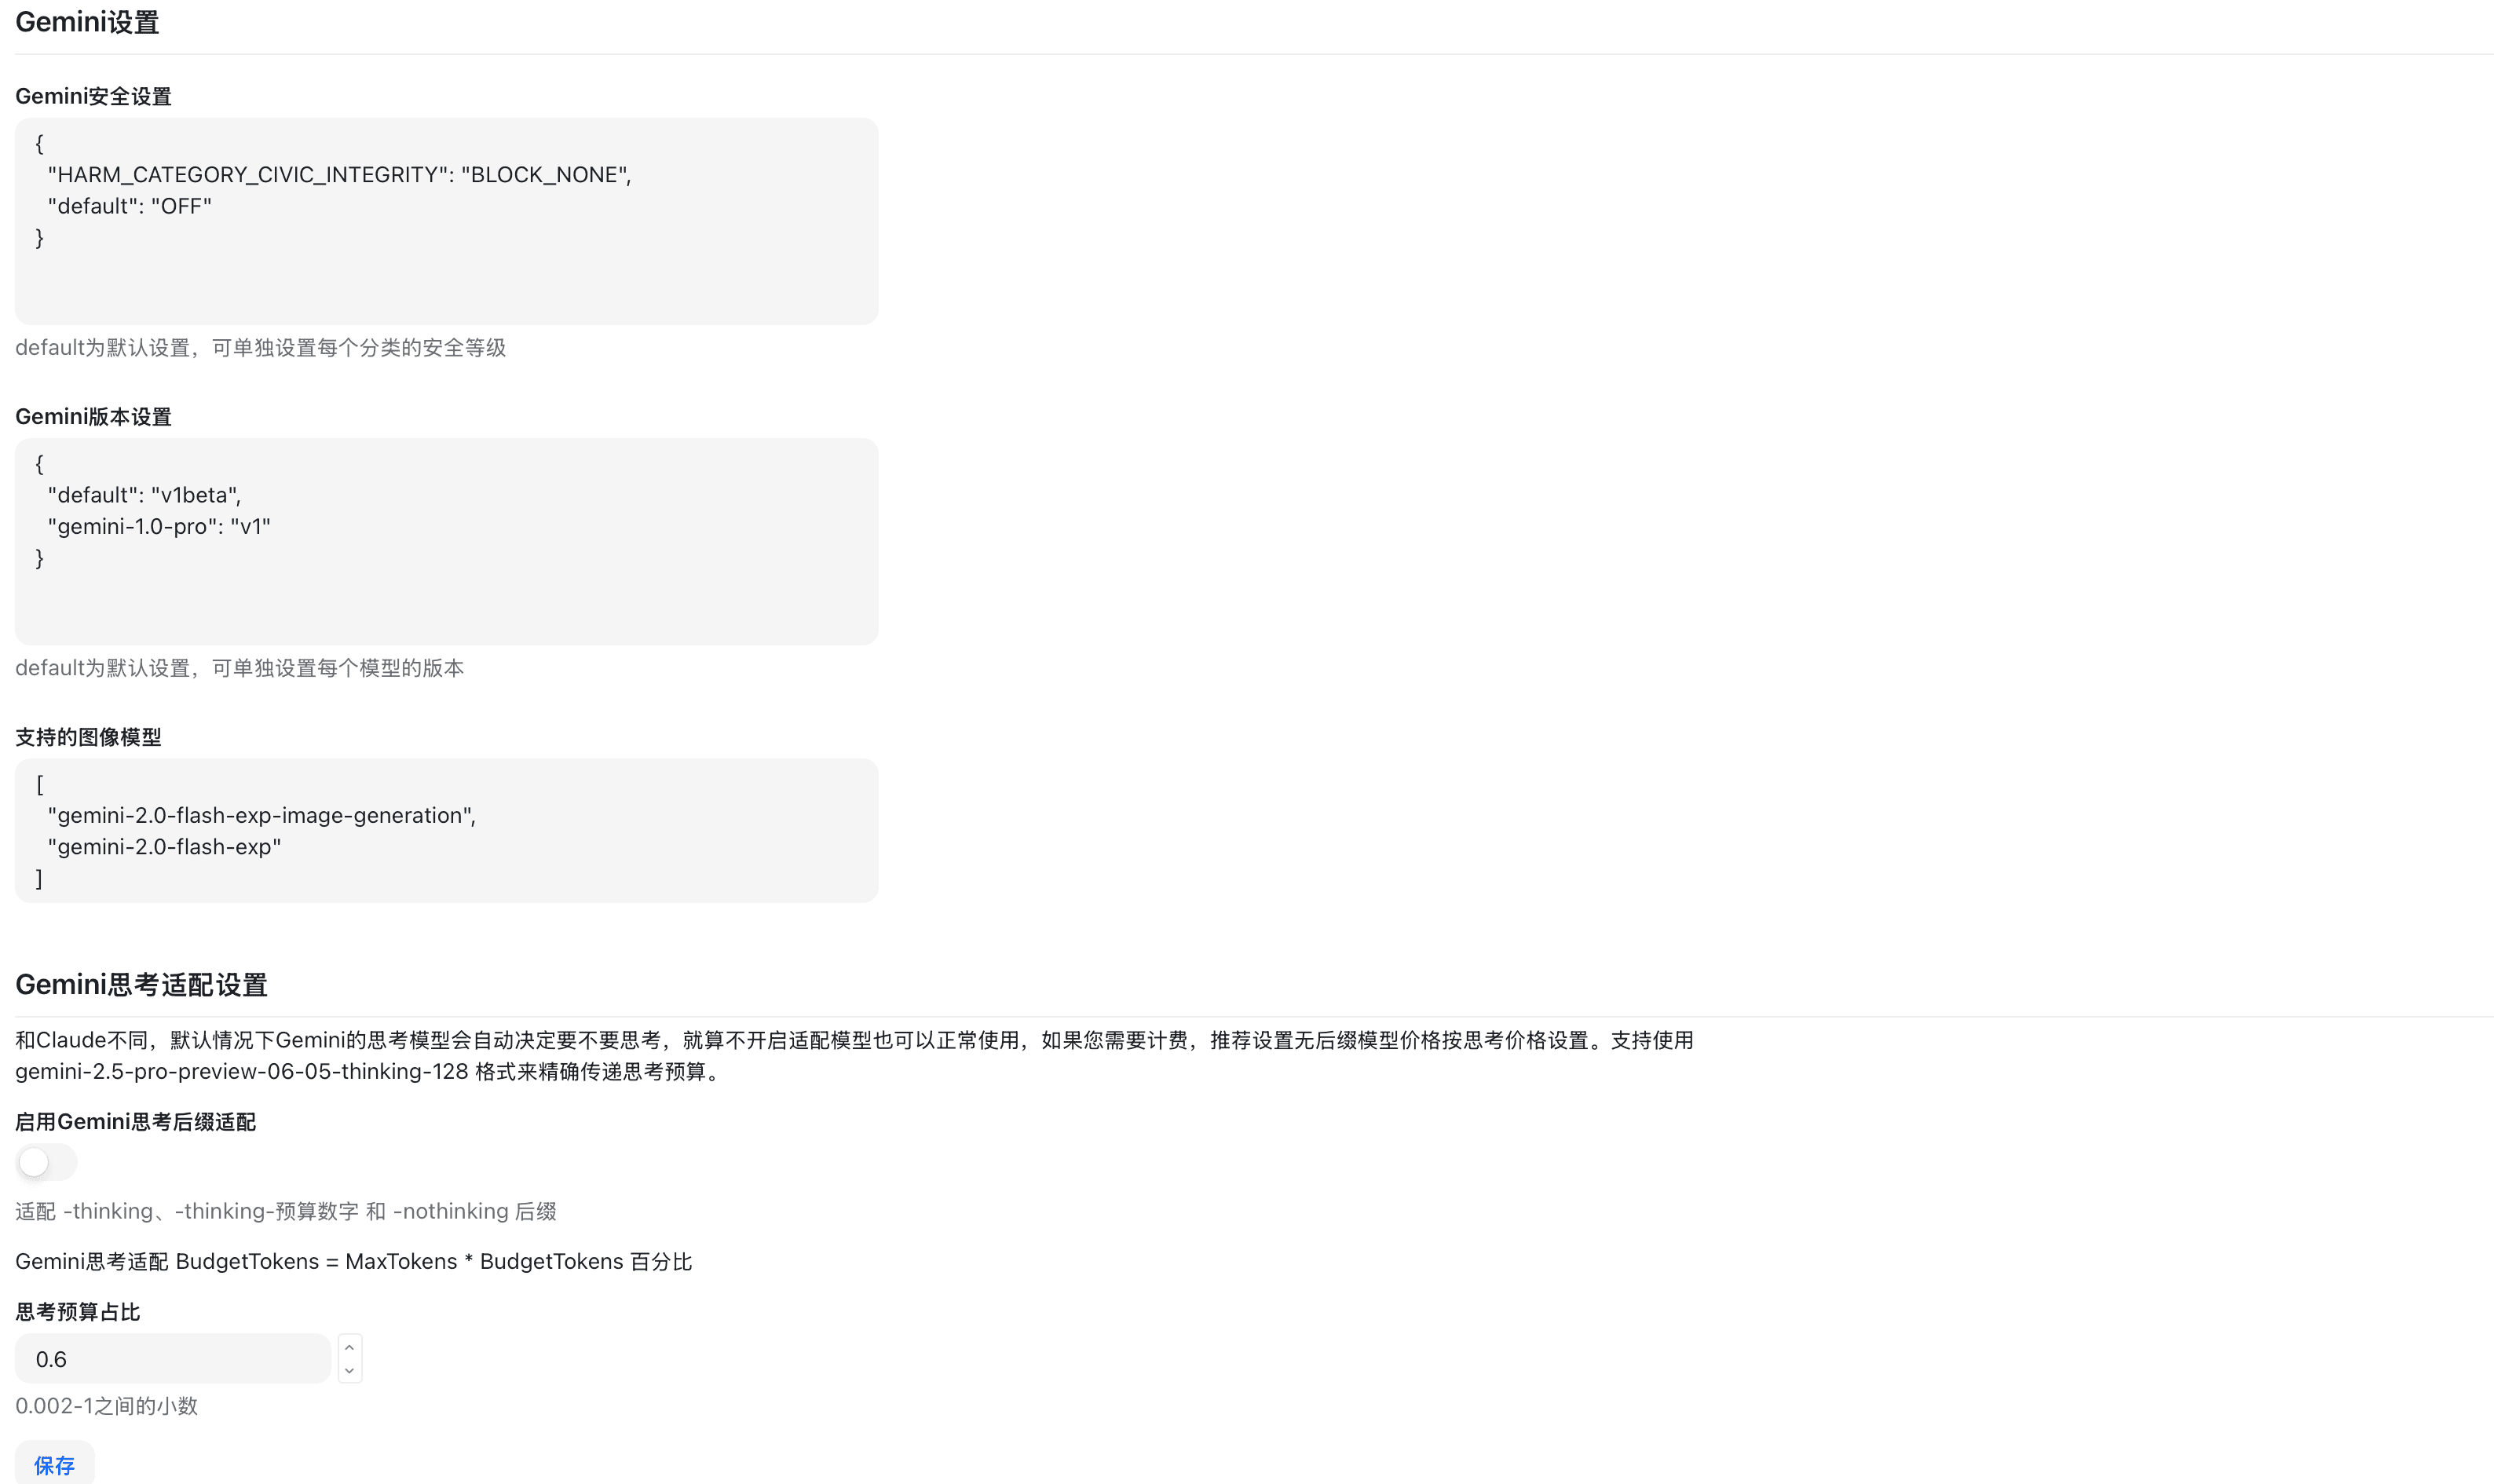
- Configure model behavior:
- Auto-disable Failed Models: Automatically disable after consecutive failures.
- Failure Threshold: Number of failures to trigger automatic disabling.
- Auto-recovery Time: Time (in minutes) for automatic recovery after disabling.
Model Synchronization Settings
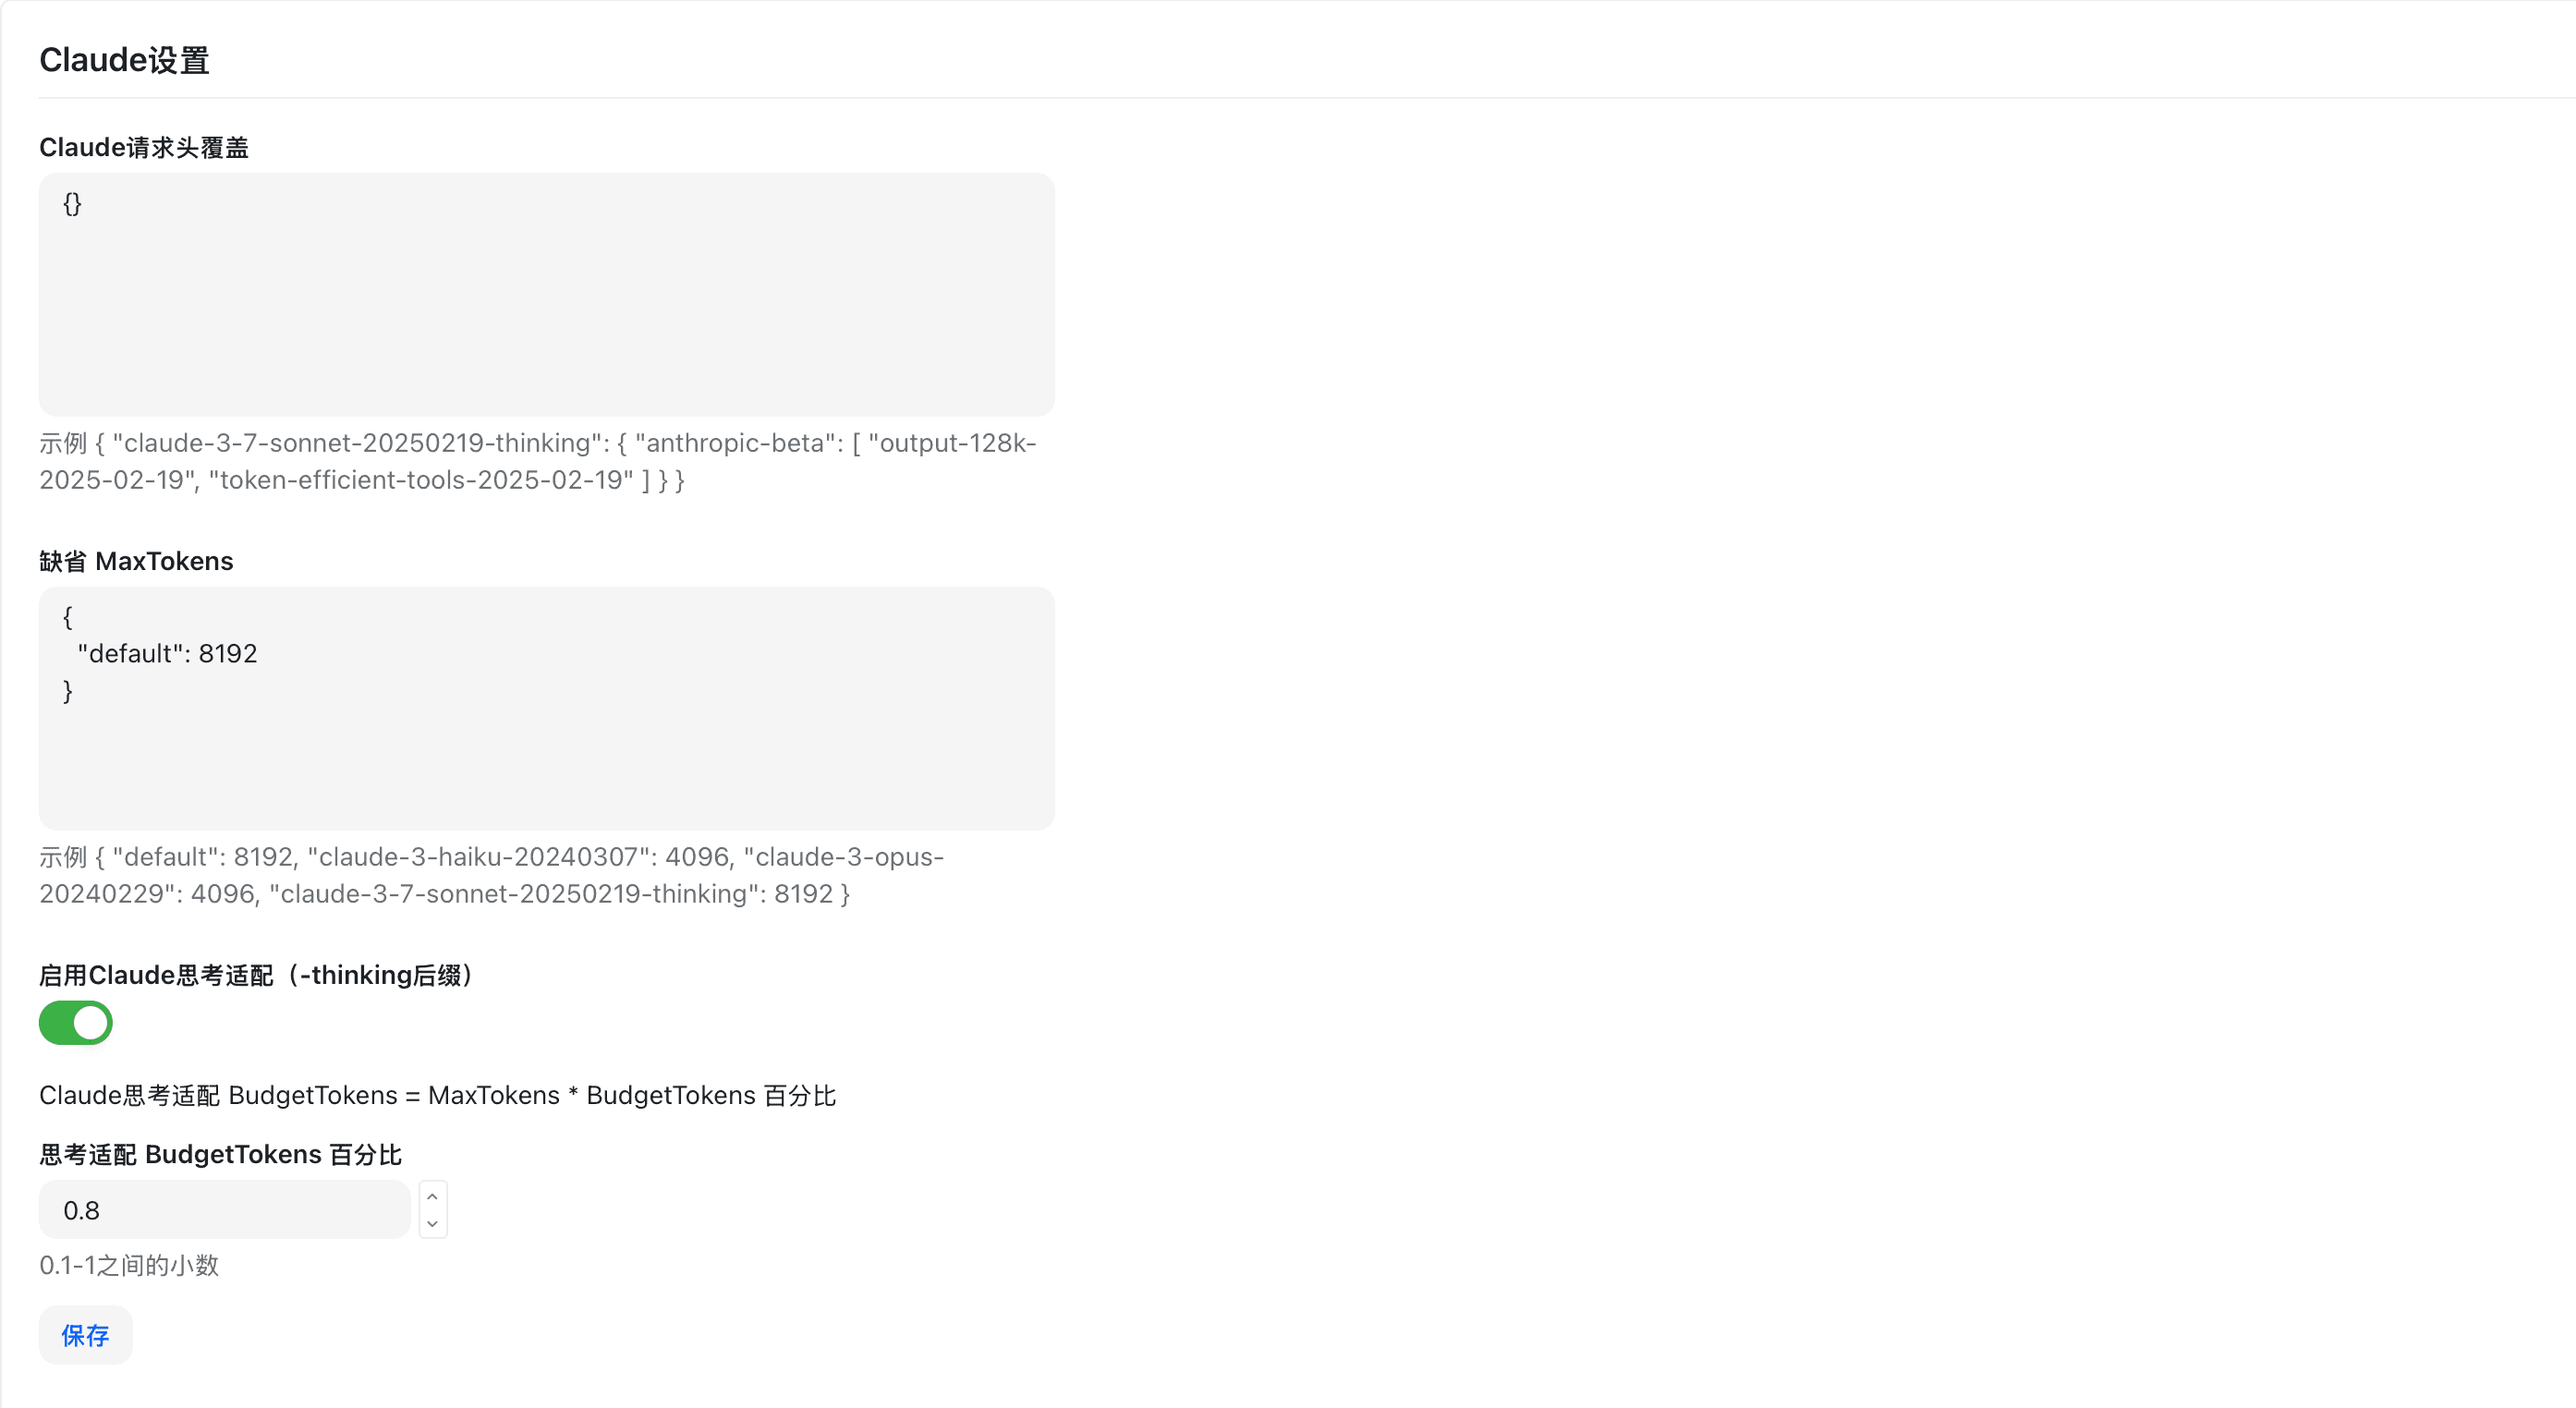
- Configure model synchronization:
- Auto-sync Upstream Models: Periodically synchronize the latest model list from service providers.
- Sync Interval: Time interval (in hours) for automatic synchronization.
- Retain Custom Configuration on Sync: Do not overwrite manually modified configurations during synchronization.
- Click "Save".
Operation Settings
Configure parameters related to platform operations.
Basic Operation Configuration
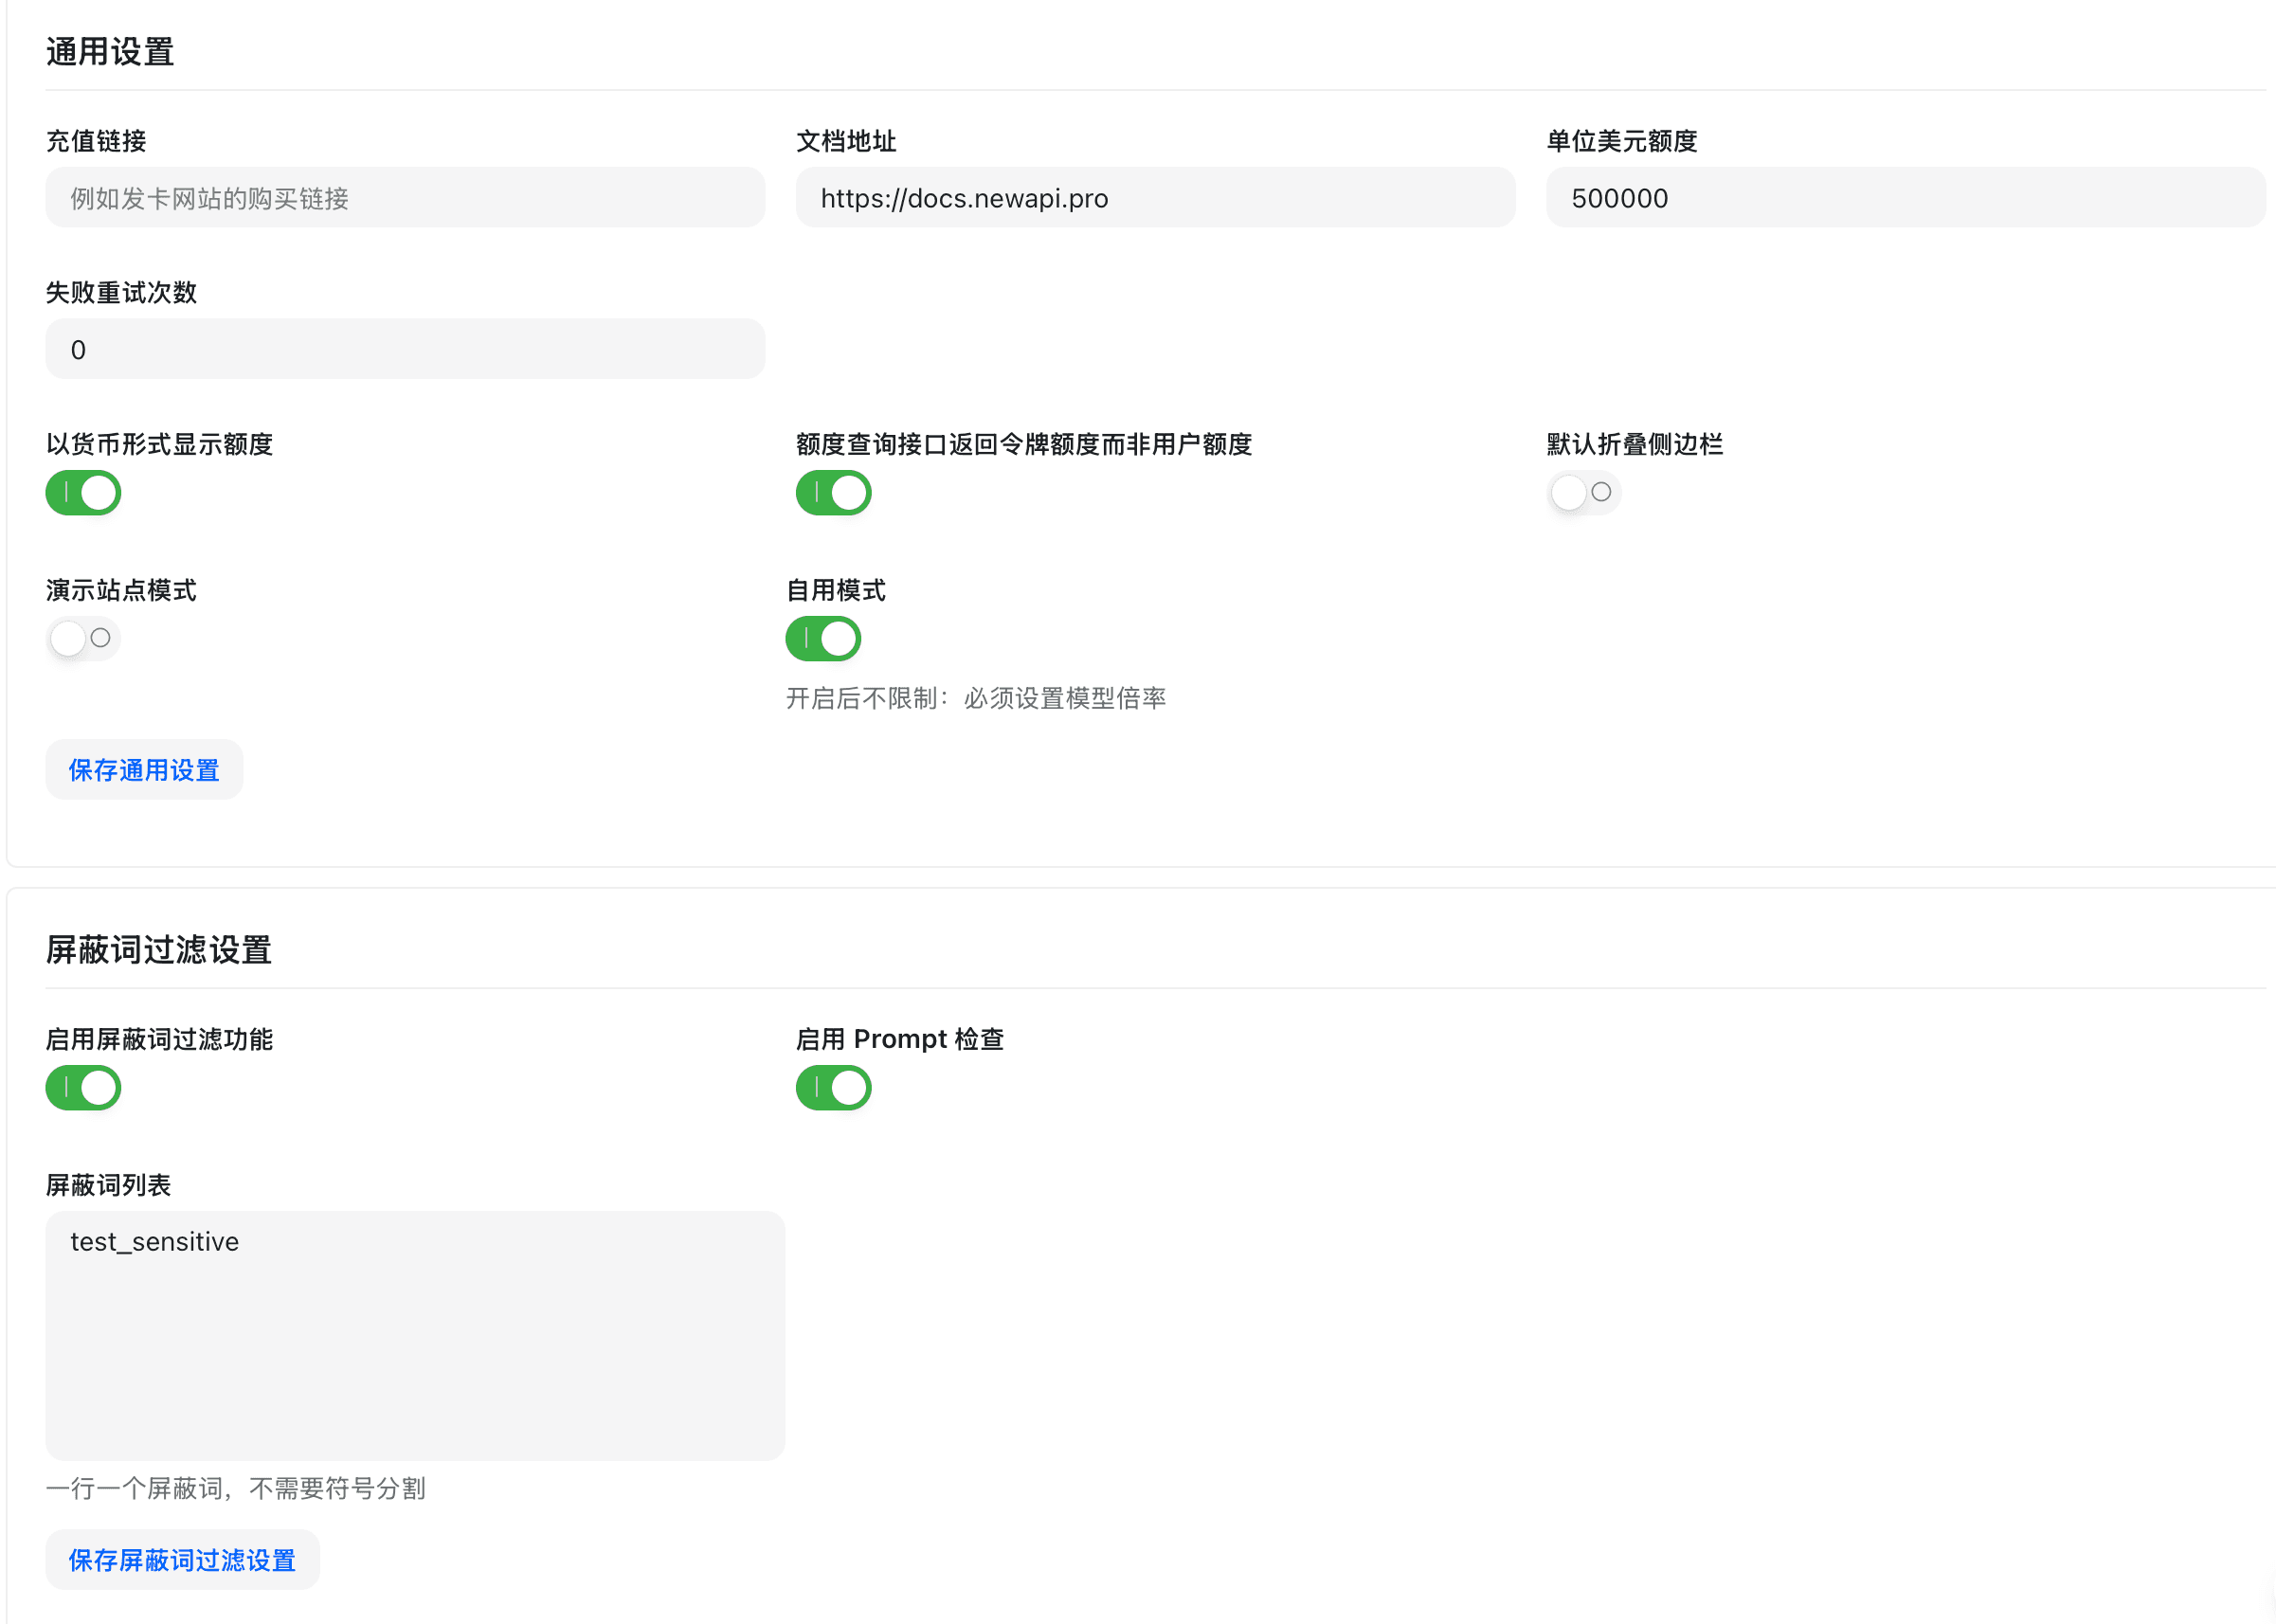
- On the System Settings page, click the "Operation Settings" tab.
- Configure operation parameters:
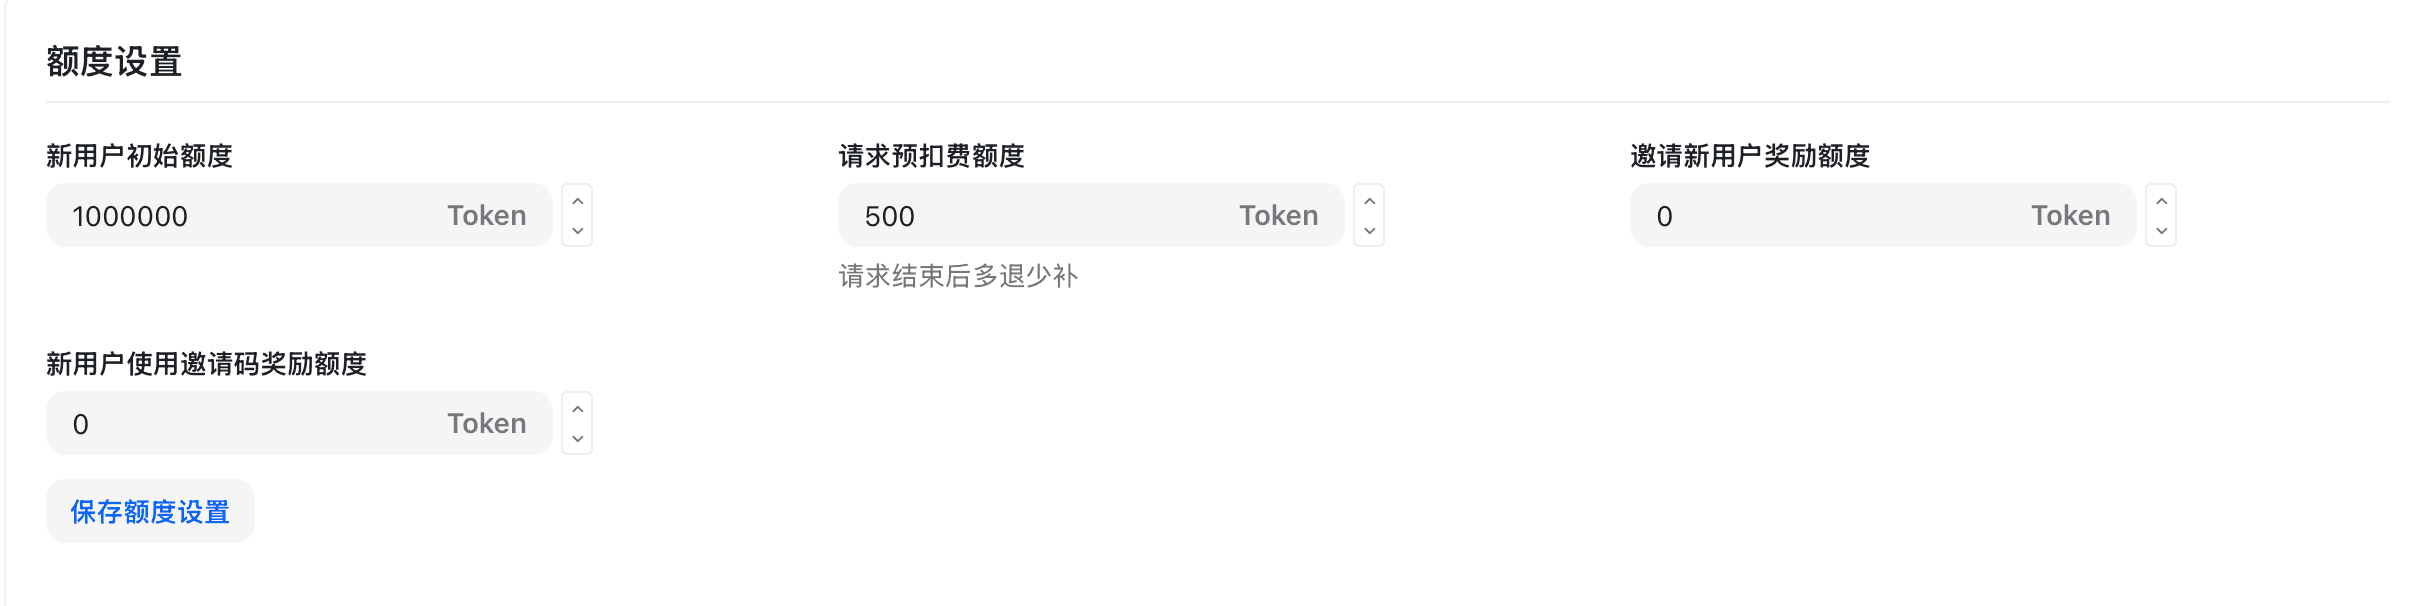
- New User Initial Quota: Initial Quota for newly registered users.
- Invitation Reward Quota: Reward Quota for inviting new users to register.
- Rebate Ratio: Rebate Ratio (%) for consumption by invited users.
Top-up Configuration
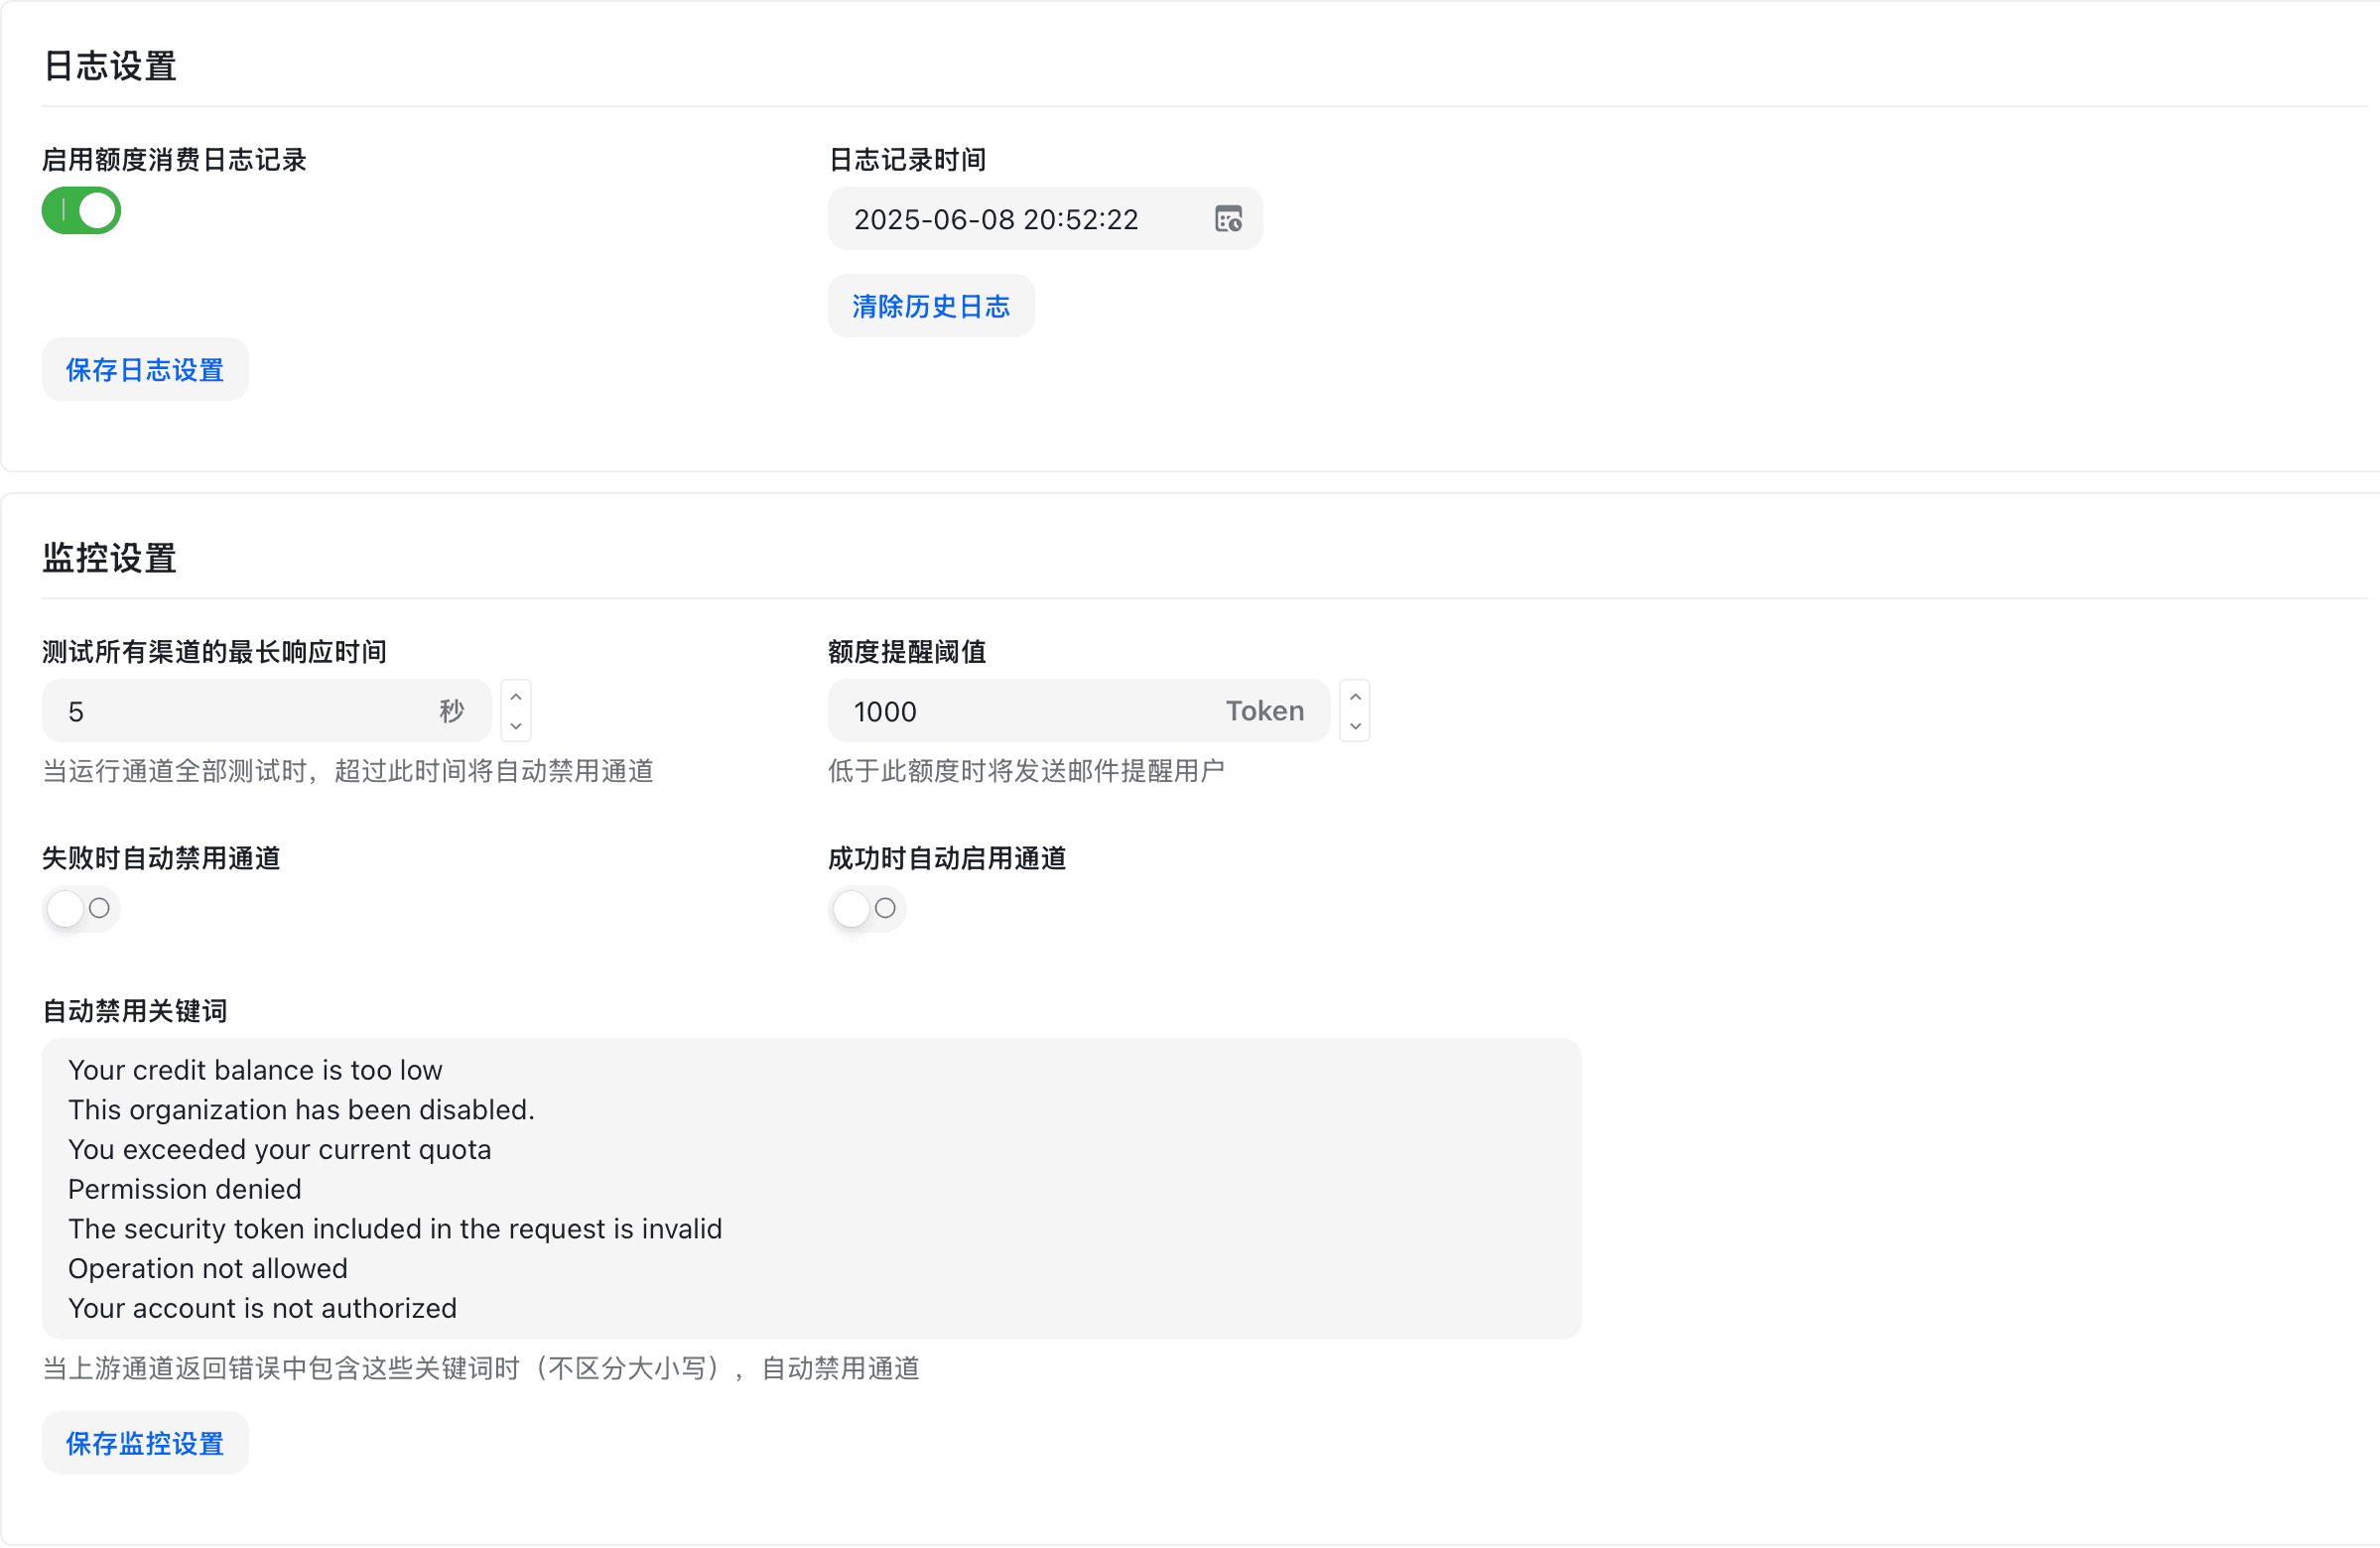
- Configure top-up options:
- Minimum Top-up Amount: Minimum amount for a single top-up.
- Top-up Bonus Ratio: Ratio of extra Quota given for top-ups.
- Top-up Tiers: Preset top-up amount options.
Redemption Code Configuration
- Configure redemption codes:
- Redemption Code Validity: Default validity period (days) for redemption codes.
- Single User Redemption Limit: Number of times each user can redeem.
- Click "Save".
Other Settings
Configure other miscellaneous parameters.
Homepage Configuration

- On the System Settings page, click the "Other Settings" tab.
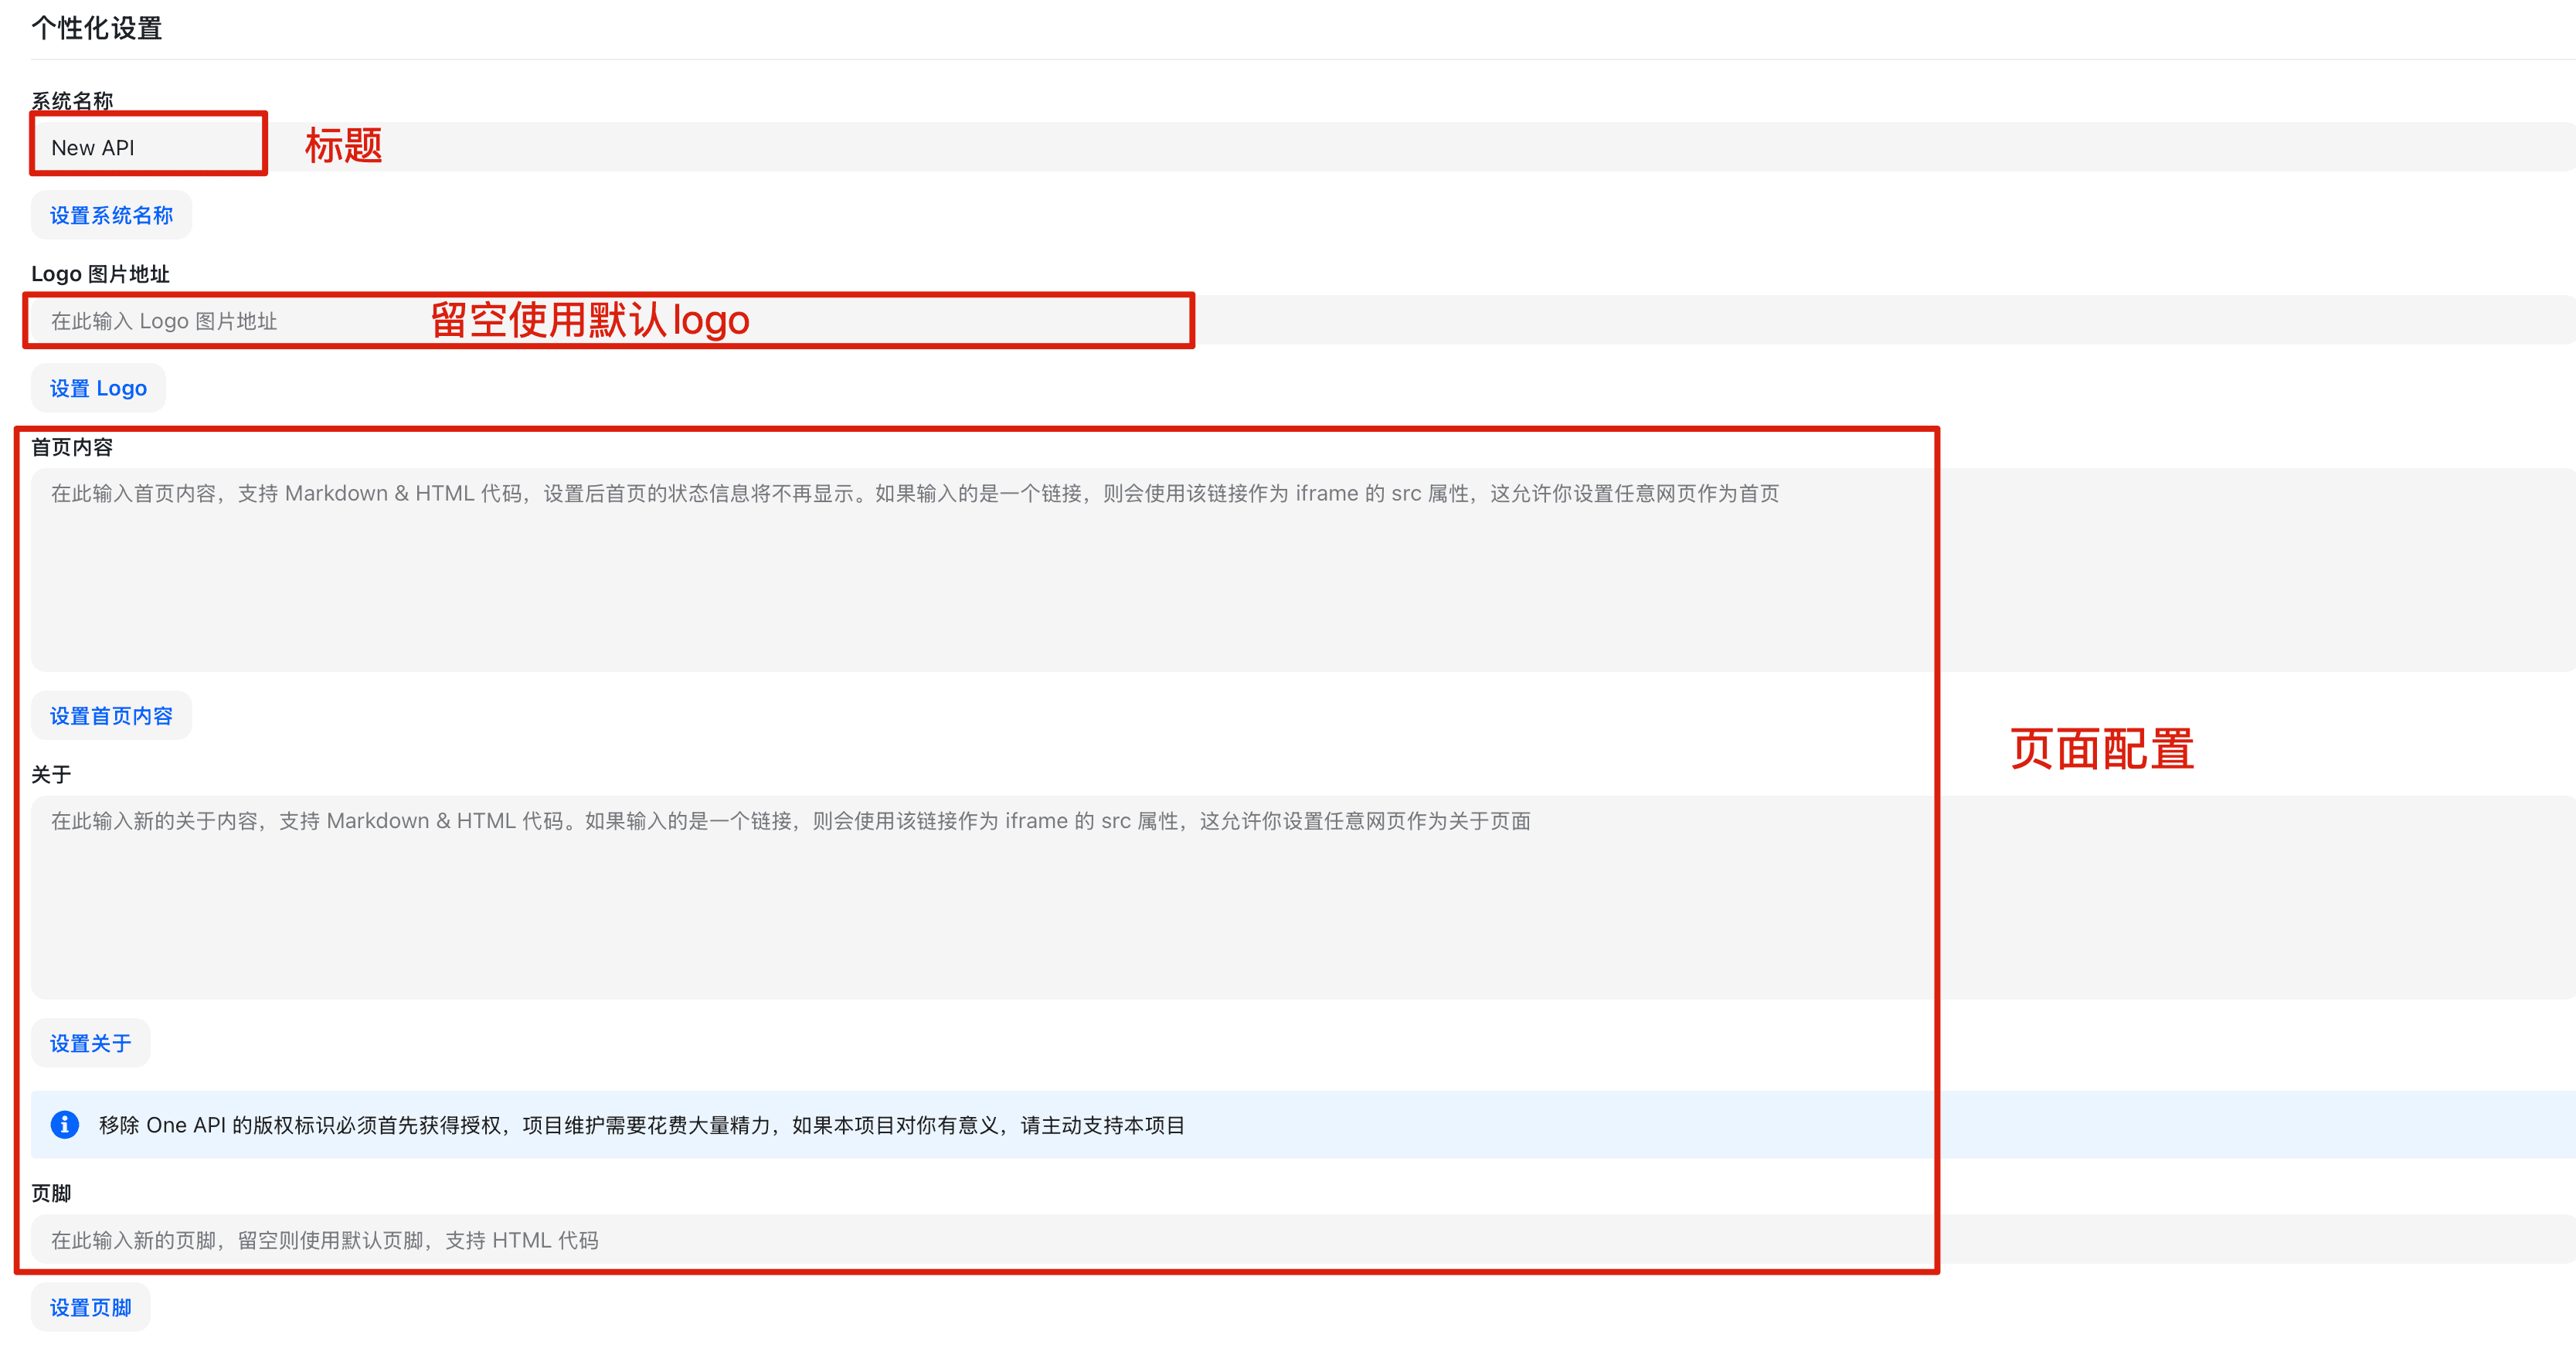
- Configure homepage content:
- Homepage Announcement: Announcement content displayed on the homepage (supports Markdown).
- Homepage Background Image: Homepage background image URL.
- Show Statistics: Whether to display platform statistics on the homepage.
Other Feature Configuration
- Configure other features:
- Enable Log Export: Allow users to export their usage logs.
- Log Retention Days: How many days of logs the system automatically cleans up.
- Enable API Documentation: Whether to display the API documentation entry point.
- Click "Save".
All the above settings are only visible and modifiable by Root users; regular administrators do not have access.
Last updated on